RC LiPo air travel: racer guide

RC LiPo air travel for racers

RC LiPo air travel starts with airline limits and smart packing. Therefore, you pass security faster and protect every pack. Moreover, you keep your race prep consistent after landing. Finally, you arrive ready to charge, discharge, and compete.

First, plan for domestic and international flights. Next, confirm your airline rules for lithium batteries. Also, remember that each carrier can set tighter limits. As a result, a quick check can save your whole travel day.

RC LiPo air travel quick checklist

To travel smoothly, follow the same routine every time. In addition, keep batteries easy to inspect at the checkpoint. Consequently, agents finish your bag check faster. Meanwhile, you reduce the risk of damage in transit.

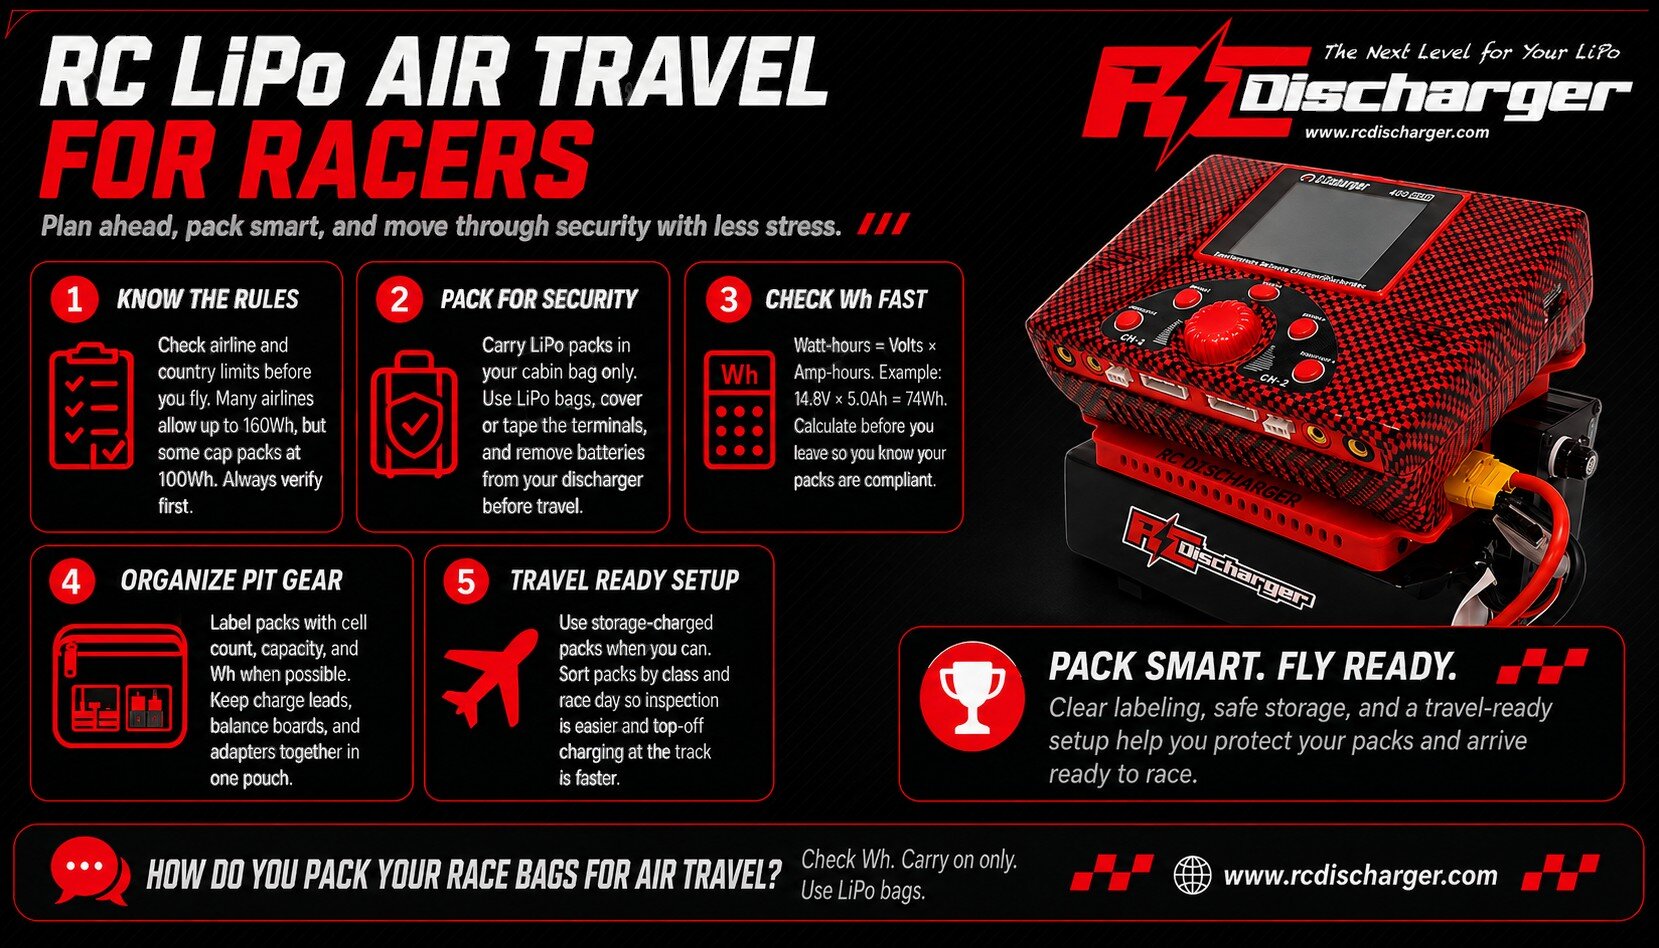
  • Know the Wh limits: Many airlines allow packs up to 160Wh. However, some carriers cap you at 100Wh, so verify before you fly.
  • Carry-on only: Put LiPo packs in your cabin bag. Therefore, never place them in checked luggage.
  • Use safe storage: Pack each battery in a quality LiPo bag. Additionally, cover terminals or tape them to prevent shorts.
  • Disconnect everything: Remove any battery from your discharger before travel. Otherwise, security may flag the setup.

Notably, watt-hours equal voltage times amp-hours. For example, a 4S pack at 14.8V and 5.0Ah equals 74Wh. Thus, you can confirm compliance before you leave. For a clear definition, review watt-hour (Wh) energy capacity.
Pack your RC electronics the smart way

Second, organize your pit gear like a tech inspector will review it. Additionally, label packs with capacity, cell count, and Wh when possible. Then, keep charge leads, balance boards, and adapters in one pouch.

As a result, you avoid long bag searches at security. Also, travel with storage-charged packs when you can. Therefore, you reduce cell stress during long trips. Moreover, you lower the chance of swelling from heat.

On the other hand, if you fly with many packs, sort them by class and day. Then, place the packs you need first at the top. Consequently, you can show them quickly during inspection. In addition, you protect balance leads from getting crushed.

Choose travel-ready discharging gear

If you race often, dedicated travel gear saves time and hassle. In fact, we built Air Travel Versions so you meet regulations without losing performance. Consequently, you can run 2S on-road or 4S off-road with a travel-ready setup.

Moreover, our Ultimate Air Travel Kit includes two airline-compliant high-performance batteries and a TSA-compliant charger setup. You can shop it here: Air Travel Kit for Regenerative Discharger (TSA compliant).

Additionally, you can choose flight-ready configurations of our most popular dischargers. Shop the 2S On-Road V3 Air Travel Version here: Regenerative Discharger 2S On-Road V3 Air Travel Version.

Similarly, you can shop the 4S Off-Road Air Travel Version here: Regenerative Discharger 4S Off-Road Air Travel Version.

Finally, you can shop the 4S On-Road Air Travel Version here: Regenerative Discharger 4S On-Road Air Travel Version.

Ultimately, RC LiPo air travel works best when you plan, pack, and present your gear clearly. Therefore, you spend less time explaining equipment and more time chasing lap times.
RC tech community Facebook group

RC tech community: the official Facebook group

RC tech community starts here with the official RC Discharger Facebook Group. First, we build race tools that save time and protect packs. However, the biggest gains often come from racers who test every weekend. Therefore, we keep one focused place where serious drivers share real results and clear routines.

Next, the group stays centered on batteries, setup, and track-ready reliability. Moreover, you can talk tech without the noise of generic pages. As a result, you spend less time guessing and more time improving your race program.

What you get inside the group

When you join, you enter a digital pit area with racers who care about details. For example, members compare notes on pack health, gearing choices, and electronics tuning. Additionally, you can ask one focused question and get practical answers from people who test weekly.

Moreover, members share repeatable checklists for race day. Consequently, you can tighten your process and reduce surprises between rounds. Meanwhile, you keep your focus on lap time, not forum drama.

  • Advanced battery tech: Track internal resistance trends, improve balancing habits, and tighten storage routines that protect punch.
  • Setup secrets: Compare chassis options, gearing ranges, and electronics settings that match current tracks.
  • Product optimization: Refine regenerative discharging workflows for stronger consistency across heats.
  • Direct support & feedback: Share logs, troubleshoot issues, and sharpen your process with other racers.

Also, you can post your baseline and ask for small, testable changes. Therefore, you avoid random “try this” advice and follow a clearer plan. Finally, you can report back with lap times and pack data so others can learn too.

Battery care topics we love to discuss

First, we talk about LiPo handling with safety and performance in mind. In addition, we keep threads practical, so you can apply ideas before your next race day. For context, LiPo chemistry rewards good habits and punishes shortcuts. Second, we cover signs of aging packs, voltage sag, and heat control.

Moreover, we discuss how consistent routines improve run-to-run feel. For example, racers share balancing timing, storage targets, and warm-up habits that keep power predictable. If you want deeper background, read about lithium polymer battery technology and then bring your questions to the group.

How to get value fast after you join

First, introduce yourself with your class, motor, and track surface. Next, post one clear goal, such as longer punch or lower heat. Then, share one data point, like internal resistance or end voltage. As a result, members can answer with steps you can test the same week.

Additionally, keep your changes small and track them. Consequently, you learn what truly helps your car, not what sounds good online. Finally, save your best routine and repeat it for consistent mains.

Ready to talk tech with racers?

Now you can stop only reading about fast setups and start sharing yours. Whether you want firmware tips, pit workflow ideas, or battery life strategies, you will fit in quickly. Finally, post a photo of your current rig and tell us what you want to improve.

RC Battery Tips & Discharger Talk

Ultimately, RC tech community works best when everyone contributes. Therefore, jump in, ask one specific question, and share one thing you learned last weekend. Then, test it at the track and report back with your results.

LiPo Break-In Setup iCharger Plan

LiPo Break-In Setup for iCharger

LiPo Break-In Setup helps a new pack avoid a flat first race run. First, never debut a brand new battery in a main. Instead, cycle it with a calm, planned sequence. Therefore, you help the chemistry settle with less stress and less heat.

Moreover, this approach aims for stable cells and cleaner punch. Additionally, you often see lower internal resistance after controlled early cycles. Consequently, you start your race program with more consistent power.

Who should use this plan

First, use this routine on brand new packs. Next, use it on packs you never cycled. Additionally, run it after a few weeks of storage. As a result, you reduce surprises when you return to the track.

  • Brand new batteries
  • Packs you never cycled
  • Packs that sat unused for weeks

However, stop the process if the pack heats up fast. Likewise, pause if a cell drifts far from the others. Then, investigate connectors, balance lead fit, and cell health.

Memory 1: Gentle awakening cycle

First, start with a mild cycle to stabilize early voltage behavior. Consequently, you build a safer baseline before higher current work. Meanwhile, keep the pack cool and watch for any unusual swelling.

blank

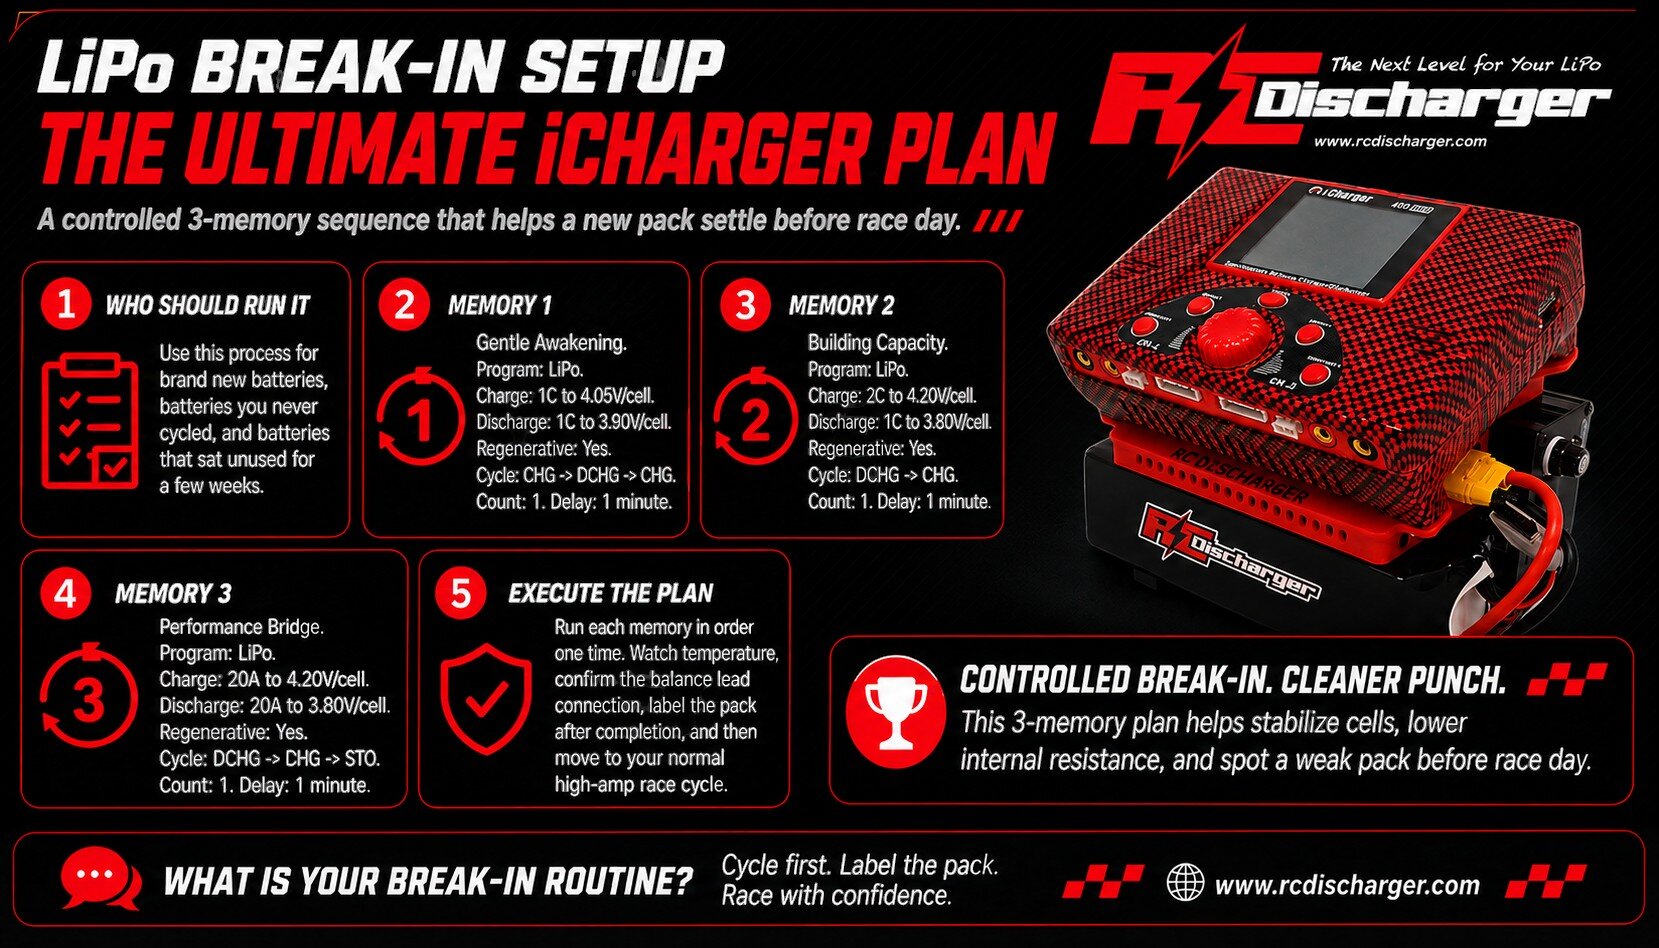
  • Program: LiPo
  • Charge: 1C rate | End-Voltage: 4.05V/cell
  • Discharge: 1C rate | Cut-off: 3.90V/cell (Regenerative: Yes)
  • Cycle Mode: CHG → DCHG → CHG | Count: 1 | Delay: 1 minute

Additionally, confirm airflow around the pack and charger. Therefore, you limit heat soak during the first conditioning pass.

Memory 2: Capacity-building cycle

Next, raise the charge rate to open up usable capacity. However, keep discharge conservative to protect the pack. As a result, you add work without pushing the cells too hard.

  • Program: LiPo
  • Charge: 2C rate | End-Voltage: 4.20V/cell
  • Discharge: 1C rate | Cut-off: 3.80V/cell (Regenerative: Yes)
  • Cycle Mode: DCHG → CHG | Count: 1 | Delay: 1 minute

Additionally, plug the balance lead firmly before you start. Consequently, the charger tracks each cell and keeps them aligned. Furthermore, log charge mAh and IR so you can spot trends early.

Memory 3: Performance bridge cycle

Then, bridge into higher current work with a controlled 20A cycle. Therefore, the pack responds closer to what you demand on track. Notably, this step also reveals weak cells before race day.

  • Program: LiPo
  • Charge: 20A | End-Voltage: 4.20V/cell
  • Discharge: 20A | Cut-off: 3.80V/cell (Regenerative: Yes)
  • Cycle Mode: DCHG → CHG → STO | Count: 1 | Delay: 1 minute

Finally, end at storage after the last charge step. Consequently, you can hold the pack safely until your next prep session. Meanwhile, store packs in a safe area and use common-sense fire safety.

How to run the 3-memory sequence

First, run each memory once in order, using cycle mode. Next, label the pack so you know it completed the sequence. Afterwards, move to your normal high-amp race cycle when you need peak output.

Moreover, review lithium polymer battery chemistry and safe handling before you push higher currents. Therefore, you protect your equipment and improve consistency. LiPo Break-In Setup also helps you catch a weak cell early, so you avoid wasting track time.

iCharger LiPo break-in setup reference image

LiPo battery cycling tips for racing

LiPo battery cycling tips for racing

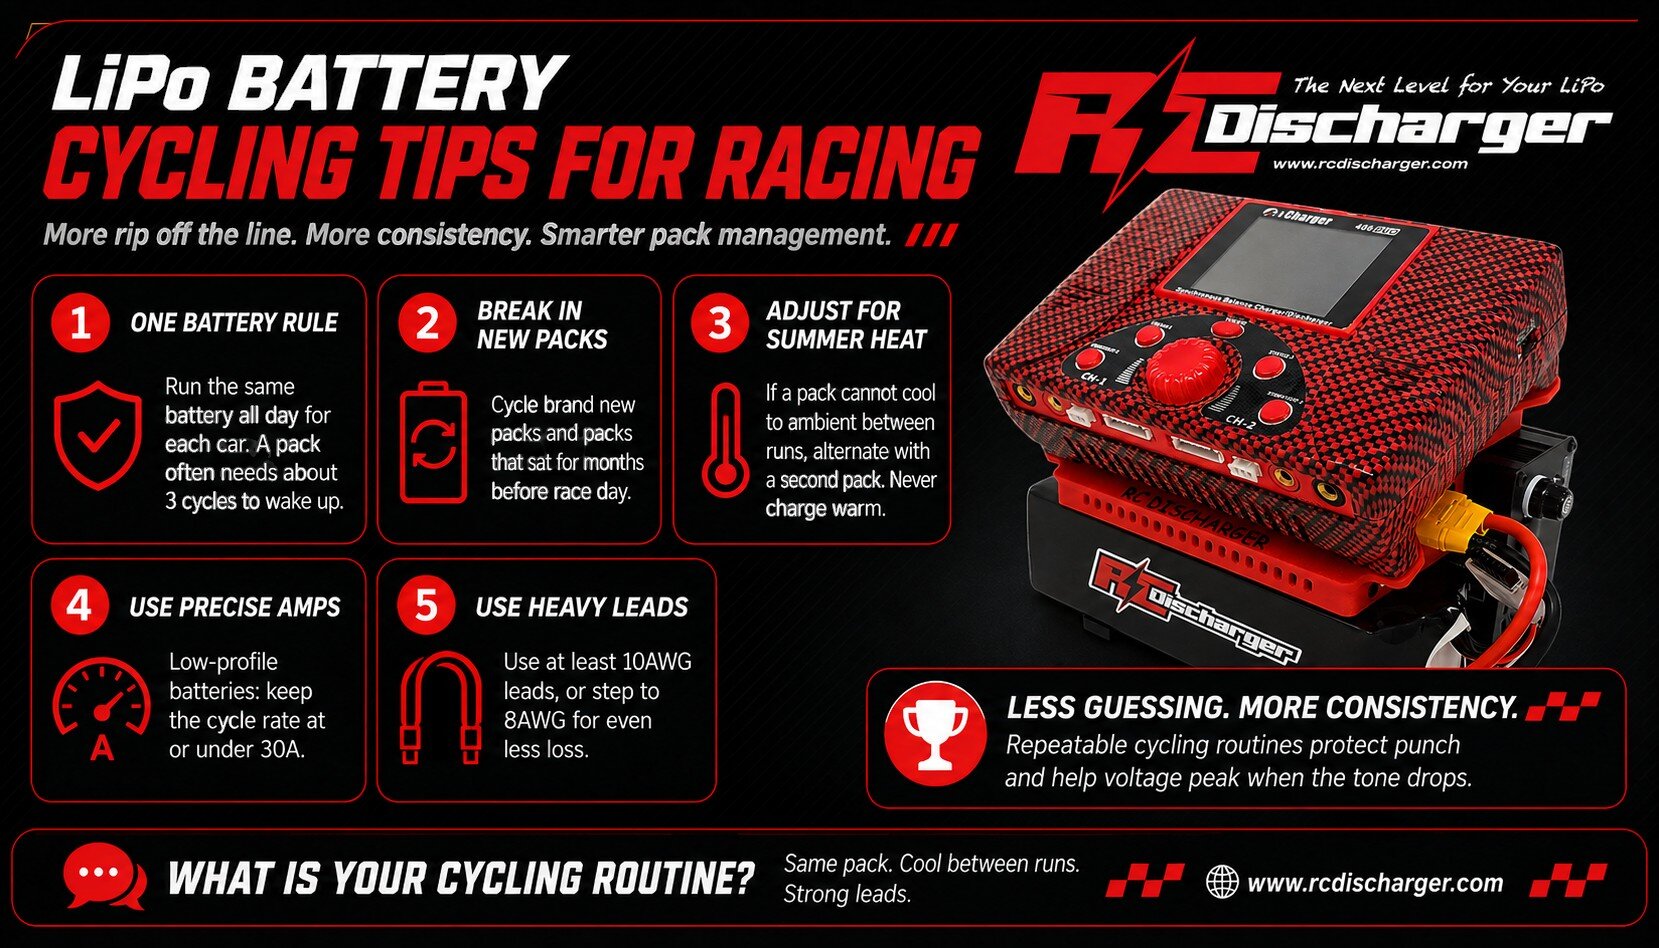
LiPo battery cycling tips help you launch harder and stay consistent. Moreover, top drivers win with pack management, not pack price. Therefore, build a simple routine you can repeat every round.

Follow the one-battery rule per car

First, dedicate one pack to each car for the whole day. As a result, you keep temperature and internal resistance in a tight window. Additionally, you stop guessing which pack feels best.

  • The reason: Typically, a LiPo wakes up after about three cycles.
  • The limit: Next, many racers run up to 20 cycles per day on one high quality pack.

In addition, track cycles with a quick note on your phone. Consequently, you spot a weak pack before it costs you a main. Also, label packs clearly so you never mix them mid-event.

Break in new packs before race day

However, a brand new pack rarely feels fastest on cycle one. Instead, plan on roughly 20 cycles before performance settles. Therefore, break in each new pack before you chase lap time.

blank

Next, use the same break-in plan for uncycled packs or packs that sat for months. As a result, you reduce early cell stress and keep IR more stable. Also, you build confidence because the pack reacts the same each run.

  1. First, cycle brand new batteries before any event.
  2. Second, cycle any battery you never ran before.
  3. Finally, cycle batteries that sat unused for several months.

For example, keep early cycles gentle, then increase load as the pack settles. Consequently, you lower sag and reduce the chance of early failure. Moreover, store packs at proper storage voltage between race weekends.

Adjust your routine for summer heat

Meanwhile, hot weather changes every decision. If a pack cannot cool to ambient between runs, alternate with a second pack. Therefore, you protect the cells and keep lap times repeatable.

Additionally, never charge a battery while it still feels warm. Instead, add airflow and wait a few minutes before charging. Consequently, you reduce swelling risk and keep the pack safer under load.

Use precise discharge amperage

Additionally, match your cycle rate to your pack style. For low profile batteries, keep the cycle rate at or under 30A. As a result, you keep punch without overstressing thin cells.

Moreover, these LiPo battery cycling tips work best with smart safety habits. For example, review lithium polymer battery chemistry and handling before you push higher loads. Therefore, you protect your gear and your results.

Remove bottlenecks in leads and connectors

Finally, your discharge routine only performs as well as your wiring. Standard leads often heat up and waste power during serious cycling. Therefore, run heavy duty charge cables with at least 10AWG, or choose 8AWG for even less loss.

Upgrade your leads here: RC charge lead options for racing setups

Ultimately, LiPo battery cycling tips deliver repeatable voltage and cleaner punch. Consequently, you spend less time guessing and more time driving smooth laps. In fact, that consistency often decides qualifiers and mains.

Resistor bank setup for iCharger

Resistor bank setup for iCharger DUO

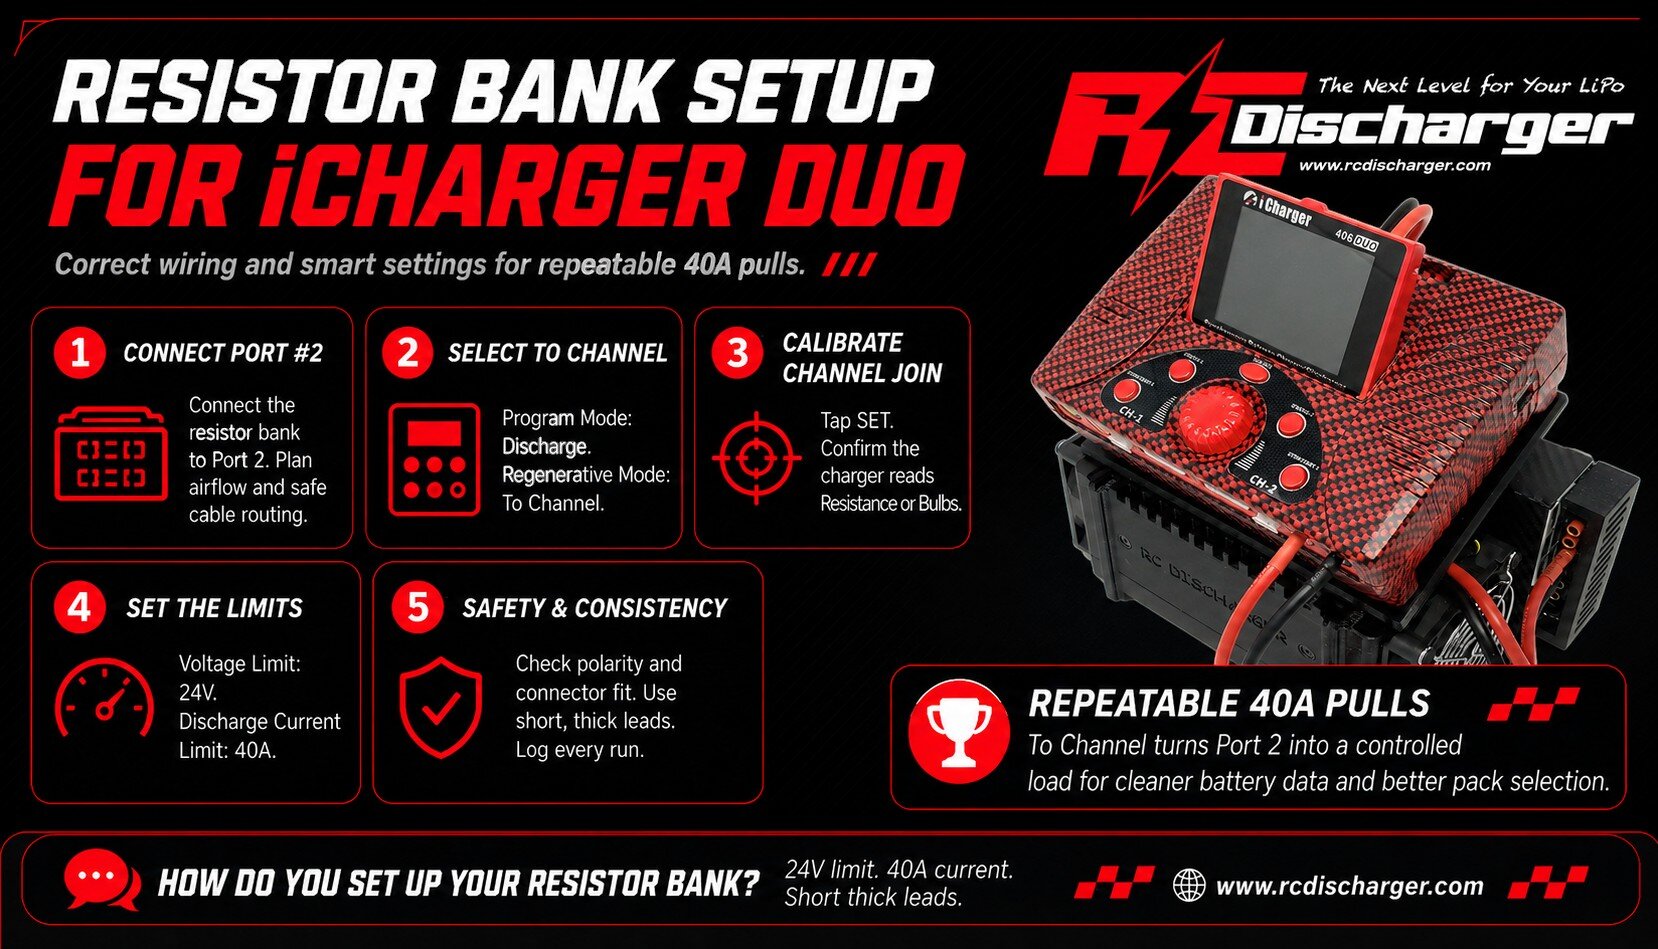
Resistor bank setup starts with correct wiring and the right menu choices on your iCharger DUO. Therefore, you get repeatable 40A pulls and cleaner battery data. Moreover, you gain better punch and more consistency on race day.

First, use this method on iCharger DUO models like 308DUO, 406DUO, 4010DUO, 456DUO, 458DUO, and 4512DUO. Next, plan your bench for airflow and safe cable routing. Consequently, you avoid heat soak and reduce voltage drop during high current runs.

Step-by-step configuration for 40A

Before you start, confirm your firmware version and match balance leads to your pack type. Additionally, place the resistor bank where it can shed heat away from your batteries. Then, follow these steps in order for stable results.

  1. Physical connection: Connect your resistor bank to Port #2 of your iCharger DUO.
  2. Program mode: Open the menu and select Discharge under Program Mode.
  3. Regenerative mode: Scroll to Regenerative Mode and choose To Channel. As a result, the charger routes energy into the resistor bank on the other port.
  4. Calibrate (Channel Join): Tap SET to calibrate. Next, under Channel Join, confirm the iCharger reads Resistance or Bulbs.
  5. Voltage limit: Set Voltage Limit to 24V.
  6. Current limit: Set Discharge Current Limit to 40 Amps.

blank

Why these settings improve your data

When you choose To Channel, you turn Port 2 into a controlled energy sink. Consequently, Port 1 pulls higher current through your race pack without hitting low limits. Moreover, your discharge curve matches race loads more closely, so your data helps you choose better packs.

In addition, 40A pulls expose weak solder joints, tired connectors, and undersized leads quickly. Therefore, you can fix resistance sources before race day and control voltage sag. Similarly, you can compare packs with the same method and spot the one that holds voltage longer.

Safety and consistency tips

First, check polarity and connector fit before you press Start. Next, keep the resistor bank ventilated and off carpet or foam. Also, stop the run if you smell hot insulation or see unstable current.

  • Use short, thick leads: Consequently, you reduce voltage drop and heat.
  • Log your runs: Then, you can compare curves across packs and days.
  • Keep pack temperatures consistent: Therefore, your results stay fair and repeatable.

Finally, if you want deeper background on how resistors convert electrical energy into heat, review resistor electrical load behavior before long, high-amp sessions. Ultimately, Resistor bank setup helps you test smarter, tune faster, and race with more confidence.

Reference image for Port 2 resistor bank wiring

iCharger SD card update guide

iCharger SD card update: no Windows needed

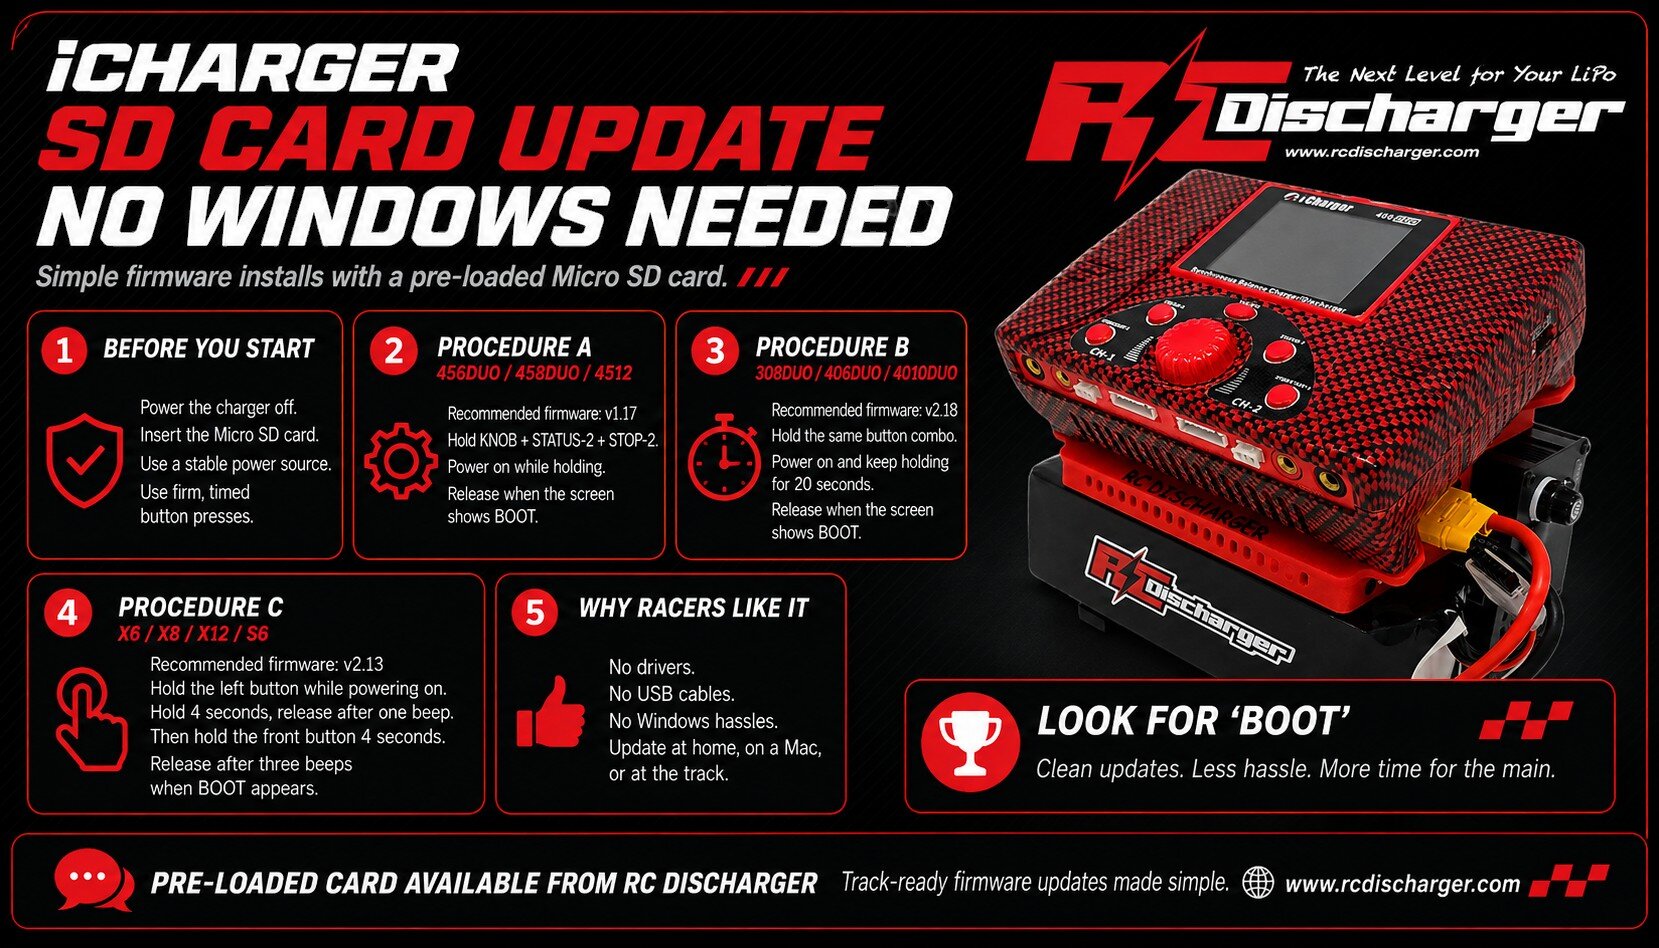
iCharger SD card update keeps firmware installs simple, even without Windows or USB drivers. Moreover, you can update at home, at the track, or on a Mac. Therefore, a pre-loaded Micro SD card helps you keep your pit routine fast. First, confirm your iCharger model and choose the matching steps below. Next, follow the order exactly to avoid a failed flash. Finally, set aside a few quiet minutes so you can focus.

Before you start

First, power the charger off before you insert the Micro SD card. Also, use a stable power source so the charger never resets mid-flash. In addition, press buttons firmly and keep the timing consistent. Consequently, the charger enters Boot mode and reads firmware from the card. For background, SD cards store data in flash memory for many devices. You can review Secure Digital card standards and formats for helpful context.

Procedure A: 456DUO, 458DUO, and 4512 series

Recommended firmware: v1.19

  1. Insert: Plug the RC Discharger Micro SD Card into your charger slot.
  2. The combo: Press and hold KNOB + STATUS-2 + STOP-2.
  3. Power up: While holding the buttons, power on the charger.
  4. Release: As soon as the screen changes and shows “Boot”, release the buttons.

blank

Procedure B: 308DUO, 406DUO, and 4010DUO

Recommended firmware: v2.18

  1. Insert: Plug the RC Discharger Micro SD Card into your charger slot.
  2. The combo: Press and hold KNOB + STATUS-2 + STOP-2.
  3. Power & wait: While holding the buttons, power on the charger. Then keep holding for 20 seconds.
  4. Release: After 20 seconds, when the screen shows “Boot”, release the buttons.

Procedure C: X6, X8, X12, and S6

Recommended firmware: v2.13

  1. Insert: Plug the RC Discharger Micro SD Card into your charger slot.
  2. Press: Press and hold the button to the left.
  3. Power up: While holding the button, power on the charger. Then hold for 4 seconds, and release after one beep.
  4. Press: Next, press and hold the button toward you for 4 seconds.
  5. Release: After three beeps, the charger enters “Boot” mode. Then release the button.

Troubleshooting for a clean flash

However, if you do not see “Boot,” start over and re-check the button timing. Also, confirm you fully seat the Micro SD card in the slot. Additionally, use a known-good power supply so voltage stays steady. Meanwhile, if the charger restarts during the process, stop and fix the power issue first. Then repeat the steps from the beginning. As a result, you reduce the risk of a corrupted firmware load.

Get race-ready now

Now you can finish an iCharger SD card update with no drivers, no cables, and no Windows hassles. Additionally, fresh firmware helps you stay consistent through long mains and busy race weekends. Ultimately, a clean update process saves time when every round counts. In addition, the pre-loaded card removes guesswork, so you spend less time in the pits.

Get your pre-loaded card here: iCharger Firmware Update Micro SD Card | RC Discharger

LiPo battery safety for RC

LiPo battery safety for RC racing

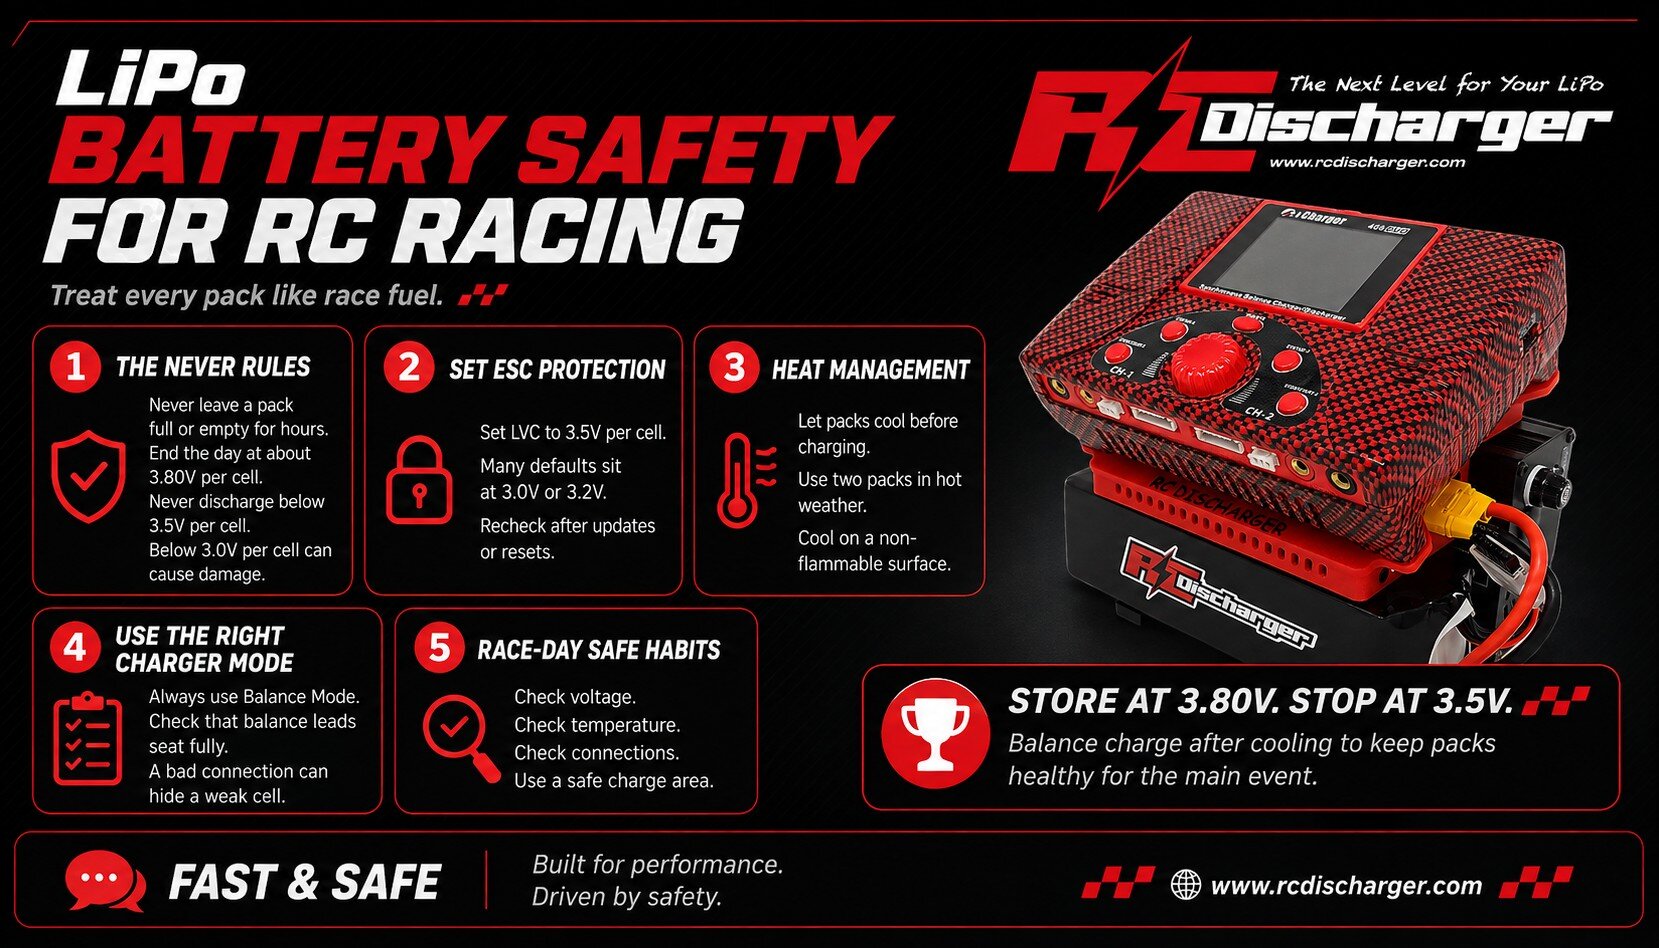
LiPo battery safety starts when you treat every pack like race fuel. Therefore, you protect power, runtime, and your pit space. At RC Discharger, we want you fast and safe. Moreover, a simple routine helps you avoid swelling, damage, and fires.

First, build habits you repeat every race day. Next, watch voltage, time, heat, and charger modes. As a result, your packs stay consistent from practice to the main.

The “Never” rules: voltage and time

First, never leave a battery full or empty for more than a few hours. Instead, keep packs in a safe voltage window between sessions. Consequently, you slow chemical stress and keep punch longer.

  1. Never leave a battery 100% full or “empty” for more than a few hours.
  • The safe window: Charge a pack only when you plan to run soon.
  • The danger zone: However, avoid leaving it full if you will not race today.
  • The solution: Therefore, end every track day with Storage Mode near 3.80V per cell.

Second, never discharge below 3.5V per cell. Accordingly, you avoid deep discharge that harms the chemistry. Also, you reduce the odds of a weak cell later.

blank

  1. Never discharge below 3.5V per cell.
  • Specifically, dropping below 3.0V per cell can cause permanent damage.
  • Fire risk: Moreover, do not force-charge a pack that you drained too low.

Set ESC protection before you race

Next, do not guess when to pull off the track. Instead, set your ESC to protect the pack every run. Also, re-check settings after firmware updates or resets. Otherwise, a default cutoff may drop too low.

  • Set your Low Voltage Cutoff (LVC): Open your ESC programming menu.
  • The target: Set cutoff to 3.5V per cell.
  • The warning: However, many defaults sit at 3.0V or 3.2V per cell.
  • The result: Therefore, a 3.5V setting keeps you in the safe zone.

Heat management and smart cycling

Heat drives most failures. Therefore, plan your battery rotation around ambient temperature and cooldown time. Meanwhile, check pack temperature after long mains. Then, wait until the pack feels cool before you charge.

  • Standard weather: Generally, you can cycle one pack all day per car.
  • Hot weather: Meanwhile, alternate between two packs so each one cools fully.
  • The golden rule: Above all, never charge a battery while it feels warm.

Also, place packs on a non-flammable surface during cooldown. For example, a ceramic tile helps reduce risk in crowded pits. Additionally, keep packs away from solvents, fuel, and loose metal tools.

Use the right charger mode every time

Using the wrong mode causes many pit fires. Therefore, choose settings that keep every cell within limits. Additionally, confirm the balance lead seats fully before you start. Consequently, you avoid a bad connection that hides a weak cell.

  • The trap: On many chargers, “Charge” mode may skip balancing.
  • The fix: Consequently, use Balance Mode for LiPo packs.
  • Also: Set the correct cell count and charge rate before you press start.

Finally, learn the basics of lithium polymer battery chemistry and risks so you spot problems early. Moreover, inspect packs after every run for swelling, nicks, or loose wires. If you see damage, then retire the pack and store it safely.

Ultimately, LiPo battery safety improves when you store near 3.80V per cell, stop at 3.5V per cell, and balance charge after cooling. Thus, you protect performance and extend pack life.

RC wire gauge guide for leads

RC wire gauge guide for charge leads

RC wire gauge guide tips help you cut heat and voltage drop in the pits. Therefore, treat wire size as a heat issue, not just an amp number. Moreover, pit temperature changes how much current your charge leads can handle. Consequently, a lead that feels fine indoors can run hot at the track.

However, many brands ship 12 AWG to save cost and space. As a result, heavy cycling and high current can expose limits fast. So, you gain consistency when you choose thicker copper early. Ultimately, better leads protect your packs, connectors, and race-day rhythm.

Heat, resistance, and lost punch

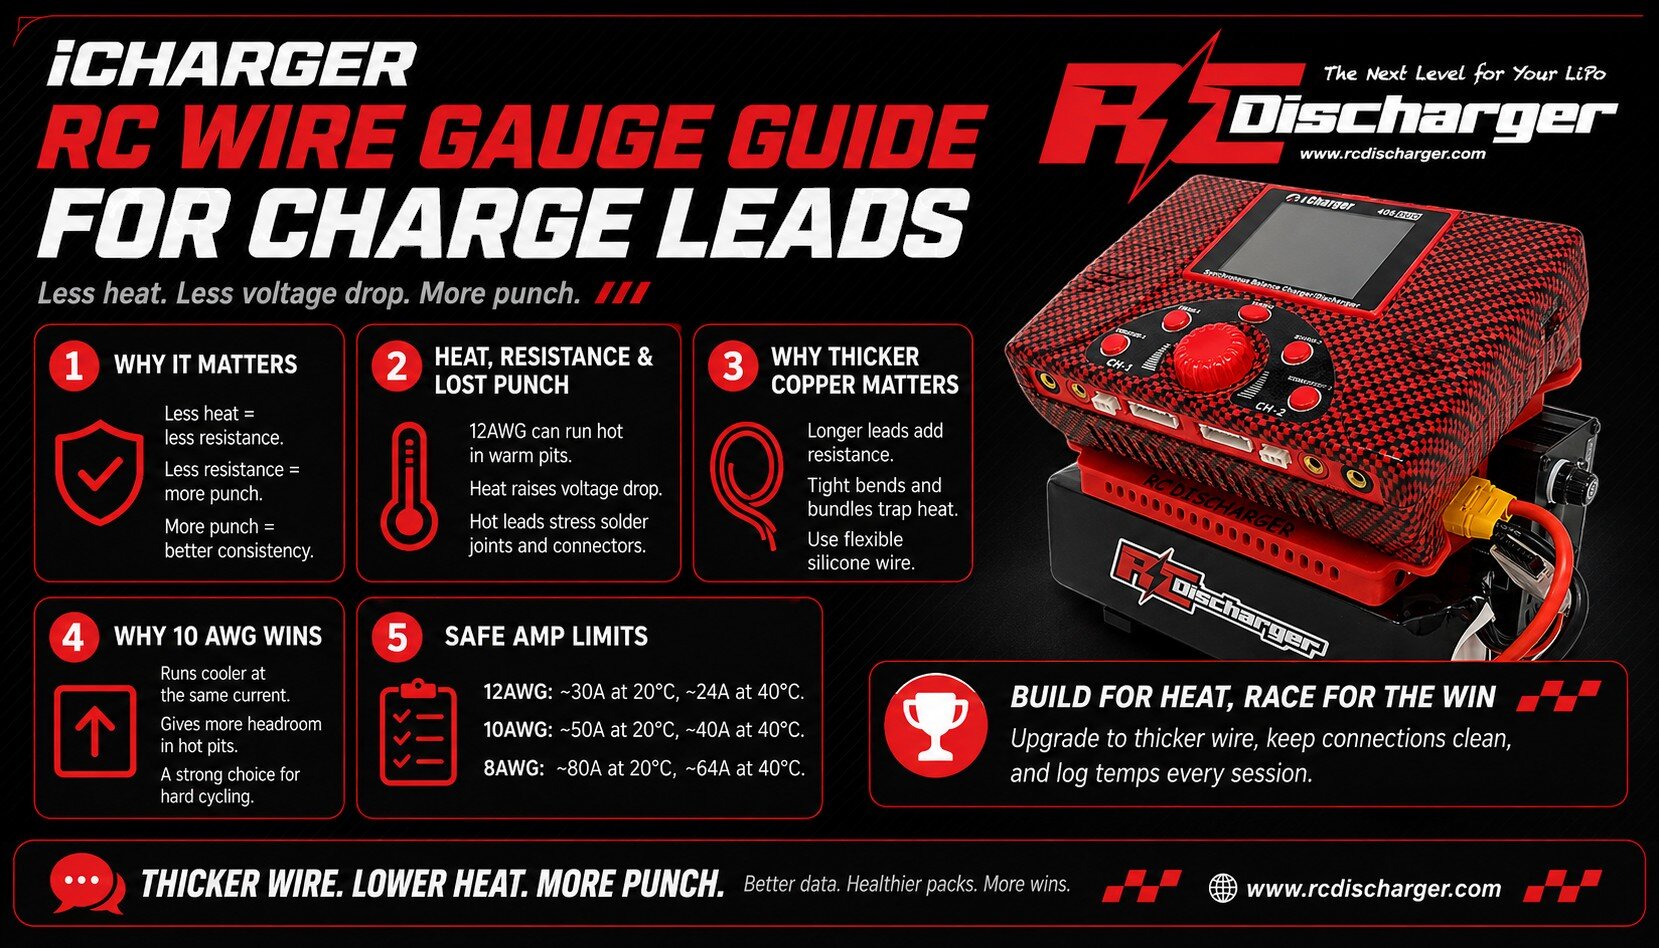
First, resistance turns current into heat, and heat steals power. For example, at 40°C (104°F), many 12 AWG setups handle about 24 A safely. Next, when you push 30 A to 40 A through warm 12 AWG, the wire heats quickly.

As a result, voltage drop rises and your pack feels softer on punch. In addition, hot leads stress solder joints and connectors. Therefore, you protect performance and reliability when you lower resistance. Likewise, cooler leads help your charger hold steadier output.

Why thicker copper matters at the track

Additionally, longer leads add resistance, so heat builds faster than you expect. Consequently, short, thick leads often feel stronger than long, thin ones. Moreover, tight bends and bundled wires trap heat around the insulation.

blank

Therefore, route leads with airflow and avoid sharp kinks near connectors. On the other hand, a thicker gauge can feel stiff with the wrong jacket. Thus, pick flexible silicone wire so you keep easy handling. Similarly, leave enough slack so plugs do not pull on solder joints.

Why 10 AWG wins in real pit conditions

We build for racing heat, so we start with thicker copper. Specifically, we use a minimum of 10 AWG on our gear for high-current cycling. Moreover, thicker wire reduces resistance, so it runs cooler at the same current.

Consequently, your charger and discharger deliver steadier power during long sessions. Similarly, 10 AWG gives you more headroom when the pit area warms up. Thus, you avoid heat soak that steals consistency. In fact, many racers notice fewer connector issues after they move up a gauge.

Safe amp limits by wire gauge

Use this quick reference before you choose leads for your race program. Then, match the gauge to your real current and your real pit temperature. Notably, lead length, airflow, and insulation also change results.

  • 12 AWG: ~30 A at 20°C (68°F), ~24 A at 40°C (104°F)
  • 10 AWG: ~50 A at 20°C (68°F), ~40 A at 40°C (104°F)
  • 8 AWG: ~80 A at 20°C (68°F), ~64 A at 40°C (104°F)

For deeper background, review American wire gauge sizing and resistance. Additionally, confirm your connector rating so the whole lead stays cool. Therefore, treat the wire, plugs, and solder as one system.

Build for the heat and race for the win

Finally, stop letting thin leads bottleneck your charging and cycling. Instead, upgrade to thicker wire to keep heat down and punch up. If you want a simple rule, choose 10 AWG when you cycle hard in summer conditions.

Get the Sensor Here: RC Charge Lead – RC Discharger

Ultimately, this RC wire gauge guide helps your pit gear stay cool, consistent, and ready for serious racing. Consequently, you spend less time troubleshooting and more time chasing lap times.
LiPo battery safety for high-amp

LiPo battery safety for high-amp cycling

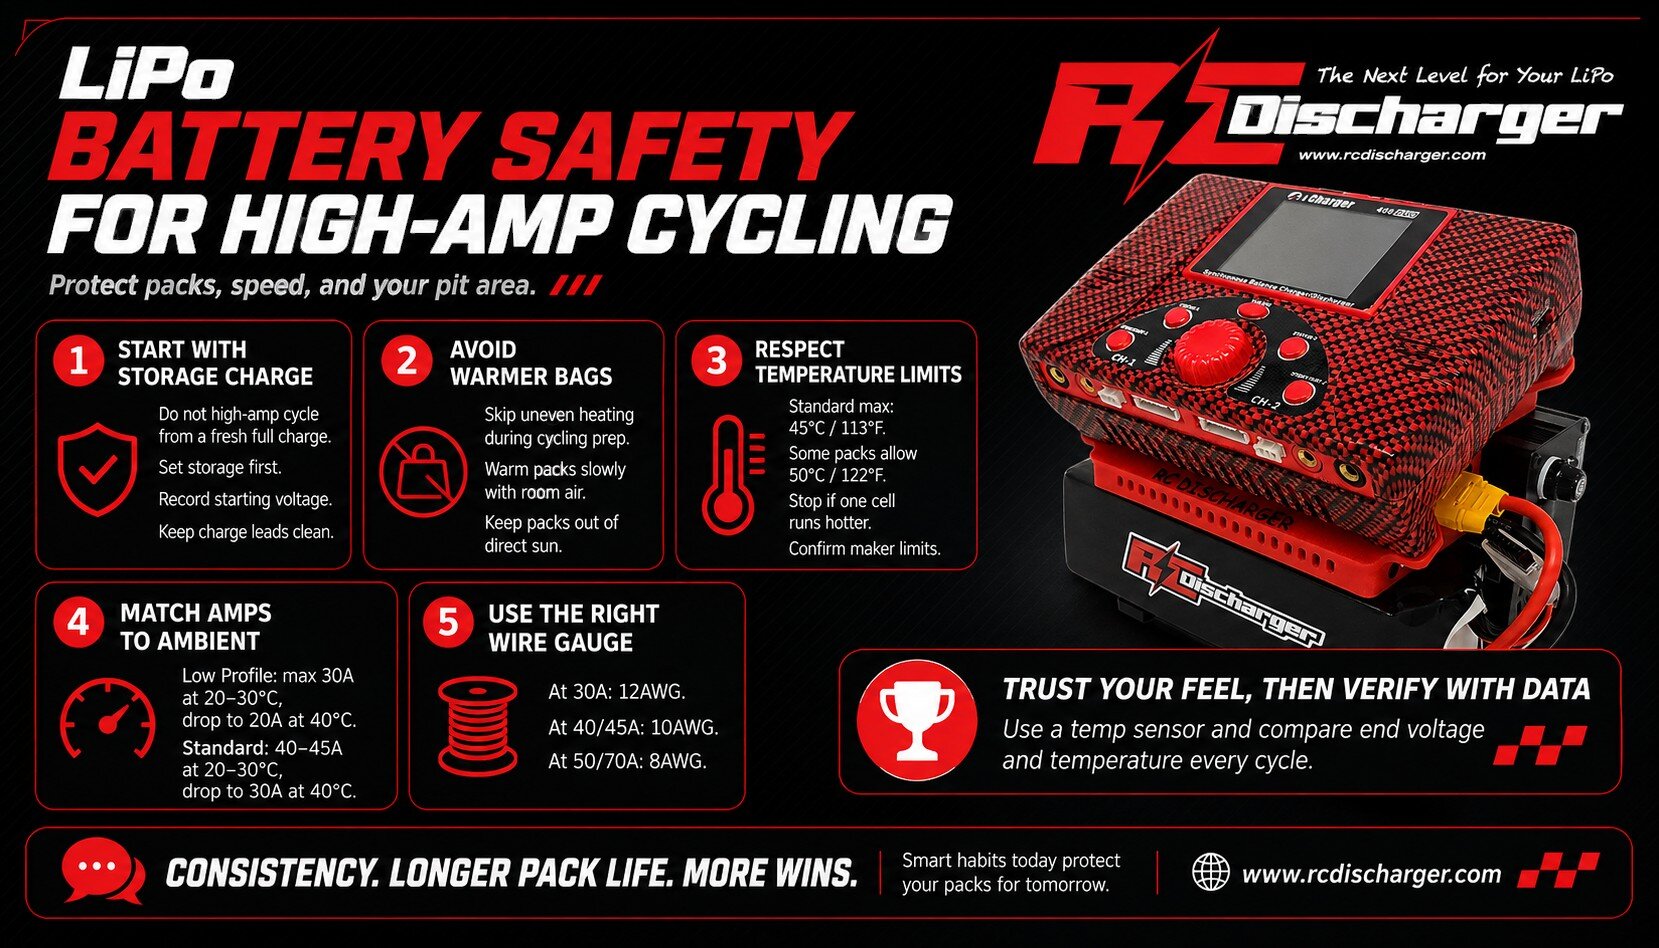
LiPo battery safety starts with smart cycling habits and clear data. Therefore, you protect packs, speed, and your pit area. Moreover, you cut heat damage that steals punch and consistency.

At RC Discharger, we build routines around repeatable numbers, not guesswork. In addition, you should log temps, amps, and cycle time each session. As a result, you spot trends early and save your best packs for mains.

Start with a storage charge

First, avoid high-amp cycling right after a full charge. Consequently, the pack takes extra stress and heats faster. Instead, set a storage charge before you start.

Then, record the starting voltage and the resting voltage after a few minutes. Therefore, you catch drift early and you keep your baseline consistent. Additionally, clean charge leads and connectors so resistance stays low.

  • The rule: Set storage charge, then run your cycle plan.
  • Additionally: Record starting voltage so you catch drift early.
  • Next: Keep charge leads clean so resistance stays low.

Avoid warmer bags and uneven heat

Next, skip LiPo warmer bags in the pits during cycling prep. However, uneven heating can spike cell temps and shorten life. Instead, warm packs slowly with room air and time.

Moreover, check temps often so you never guess. Similarly, keep packs out of direct sun on hot race days. Consequently, you avoid heat soak before the first pull of current.

blank

Respect temperature limits every cycle

Notably, temperature gives you the clearest health signal. Therefore, treat your max temperature as a hard stop, not a goal. Also, stop the cycle if one cell runs hotter than the rest.

  • Standard max: Many brands stop around 45°C (113°F).
  • High-temp max: Some packs tolerate 50°C (122°F).
  • Finally: Confirm your pack limit in the manual.

For background, review lithium polymer battery safety basics before you push high amps.

Match ambient temperature to your amps

Meanwhile, hot pit days demand lower amps. Consequently, you reduce heat soak and keep internal resistance steadier. Additionally, target the same end temperature each cycle so your results compare well.

For example, if the pack ends hotter than your target, drop amps or shorten the cycle. Conversely, if the pack ends too cool, increase time slightly before you raise amps. Therefore, you tune safely without chasing random changes.

Use the right wire gauge

Also, do not choke power with thin leads. As a result, voltage drops and connector heat rise fast. Moreover, tight solder joints keep readings stable from run to run.

  • At 30A: Run at least 12AWG leads.
  • At 40A/45A: Run at least 10AWG leads.
  • At 50A/70A: Run at least 8AWG leads.

Additionally, inspect connectors for discoloration or looseness after each session. Consequently, you prevent hidden resistance that inflates temps and ruins comparisons.

Trust your feel, then verify with data

Ultimately, instincts help, but data wins races. Therefore, use a temperature sensor and set an auto-stop threshold. In addition, compare end voltage and temperature after each cycle to confirm repeatability.

Get the Sensor Here: iCharger Temperature Sensor for LiPo Battery | RC Discharger

In fact, LiPo battery safety improves consistency across rounds. Moreover, it helps your best packs stay competitive for more race days. As a result, you spend less time chasing problems and more time chasing wins.

High-amp cycling setup reference image

Accurate IR readings for RC packs

Accurate IR readings for RC packs

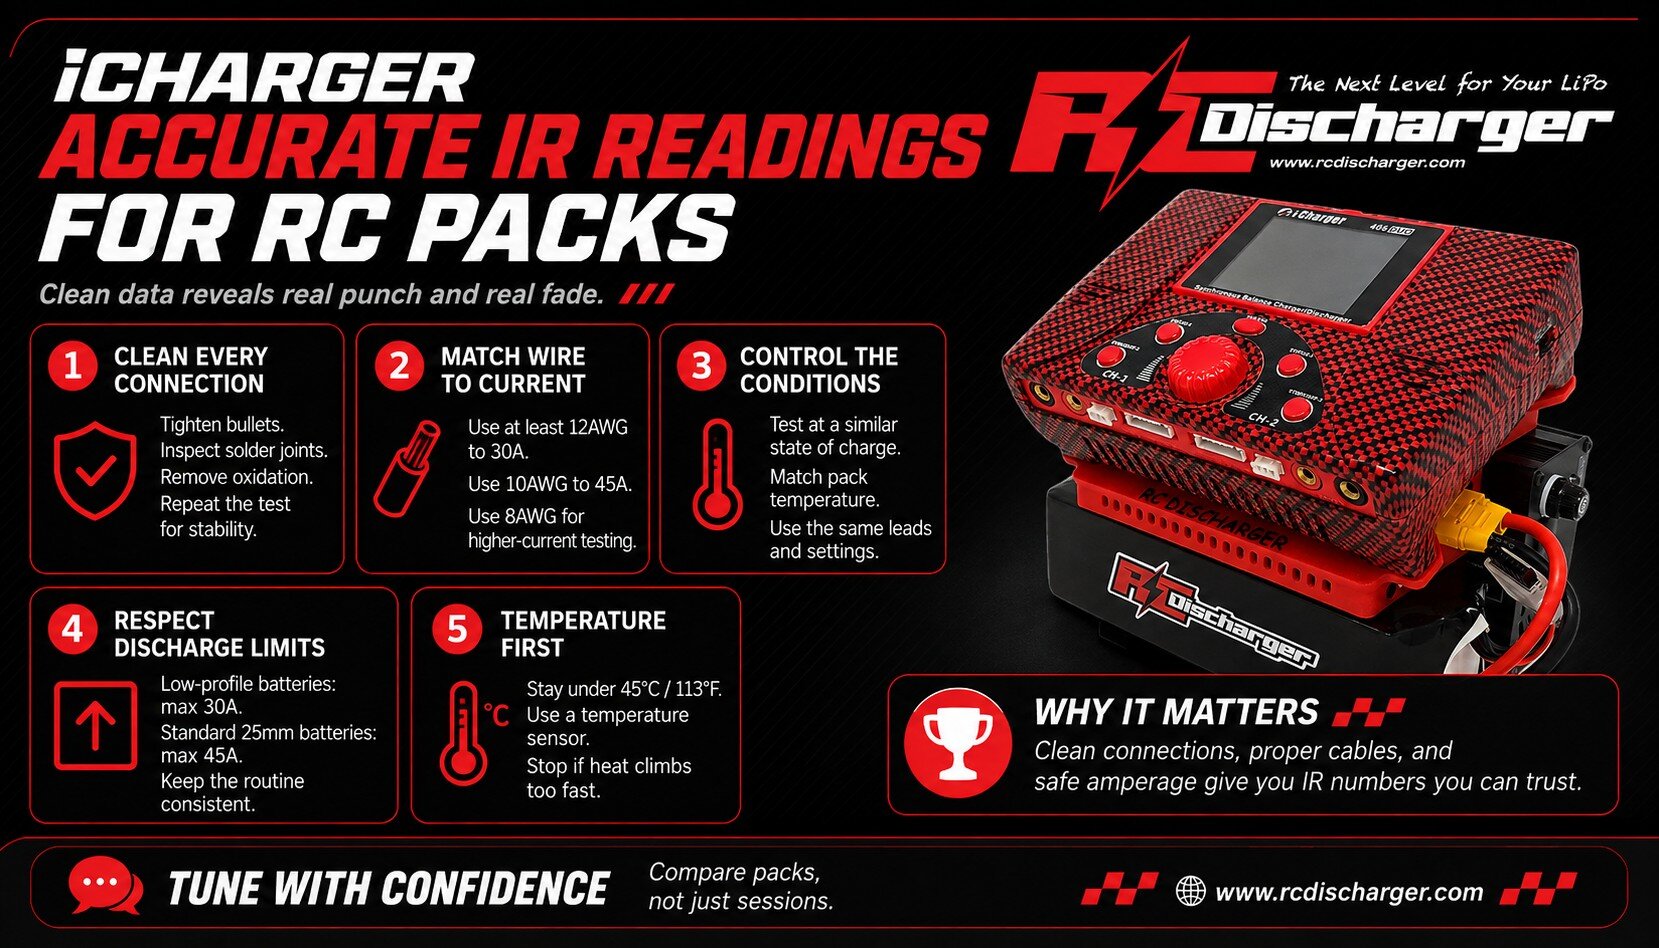
Accurate IR readings help you confirm real punch and spot real fade. However, when values jump, you start guessing. Therefore, you need a repeatable routine that removes small errors. At RC Discharger, we focus on clean data that racers trust. Moreover, consistent IR lets you compare packs across days, not just single sessions. As a result, you can tune charge and discharge choices with confidence.

Start with tight, clean connections

First, check every connector before you test. A loose 5mm bullet adds resistance and creates heat fast. Consequently, your meter reports higher IR that comes from the connection, not the cell. Next, inspect bullets, balance leads, and solder joints for oxidation or looseness. Also, wipe contact surfaces and fully reseat plugs before each run. Then, run one test cycle and repeat it to confirm stability.

Notably, team driver Ronnie Vasquez reduced IR swings after he tightened connectors and lowered amperage slightly. Therefore, treat these details like race prep, not like a quick chore. In addition, label your packs and record results so you can spot trends early.

Match cable gauge to your current

blank

Second, choose wire that matches your test amperage. Thin wire warms up, and that heat shifts resistance during the test. In addition, hot leads can hide a strong pack and make it look weak. Therefore, use a simple gauge rule and stick to it every time.

  • Up to 30A: use at least 12AWG cable.
  • Up to 45A: use at least 10AWG cable.
  • Up to 70A: use at least 8AWG cable.

Similarly, keep leads short when possible. Moreover, avoid adapter stacks because each joint adds loss and variation. As a result, your readings reflect the pack more than the harness.

Respect pack size and discharge limits

Third, match discharge current to pack size and build. Too much current stresses the pack and can push cells out of balance. Consequently, you may create the sky-high IR you wanted to measure. Instead, follow conservative limits and keep conditions consistent.

  • Low-Profile Batteries: max 30A.
  • Standard (25mm) Batteries: max 45A.

Additionally, test at the same state of charge each time. For example, pick one SOC window and stay there for every pack. Thus, you compare pack health, not changing conditions. Likewise, let the pack rest a few minutes after charging so voltage settles.

Safety first: control temperature every time

Finally, monitor temperature during high-current cycles. Never let packs exceed 45°C (113°F). Therefore, you protect the pack and keep data stable. Also, use a dedicated sensor so you can react fast. Grab your sensor here: iCharger temperature sensor for LiPo battery.

In fact, heat changes resistance in wiring and connectors. Consequently, temperature swings can distort comparisons between sessions. If you want the theory behind that effect, review electrical resistance and conductance before your next test day. Ultimately, when you control connections, cables, current, and heat, Accurate IR readings become repeatable and useful.

iCharger firmware update guide

iCharger firmware update guide for race day

iCharger firmware update matters before you cycle packs on race day. Therefore, you prevent odd charger behavior in the pits. Moreover, you keep your Regenerative Discharger and charger pairing consistent. Before a long conditioning session, take 30 seconds to confirm the software. As a result, your discharge steps stay smooth and predictable.

Additionally, a quick check helps you avoid connection hiccups on busy days. Consequently, you spend less time troubleshooting and more time focusing on driving. Furthermore, you protect consistency across stock and modified programs.

Quick check: find your firmware version

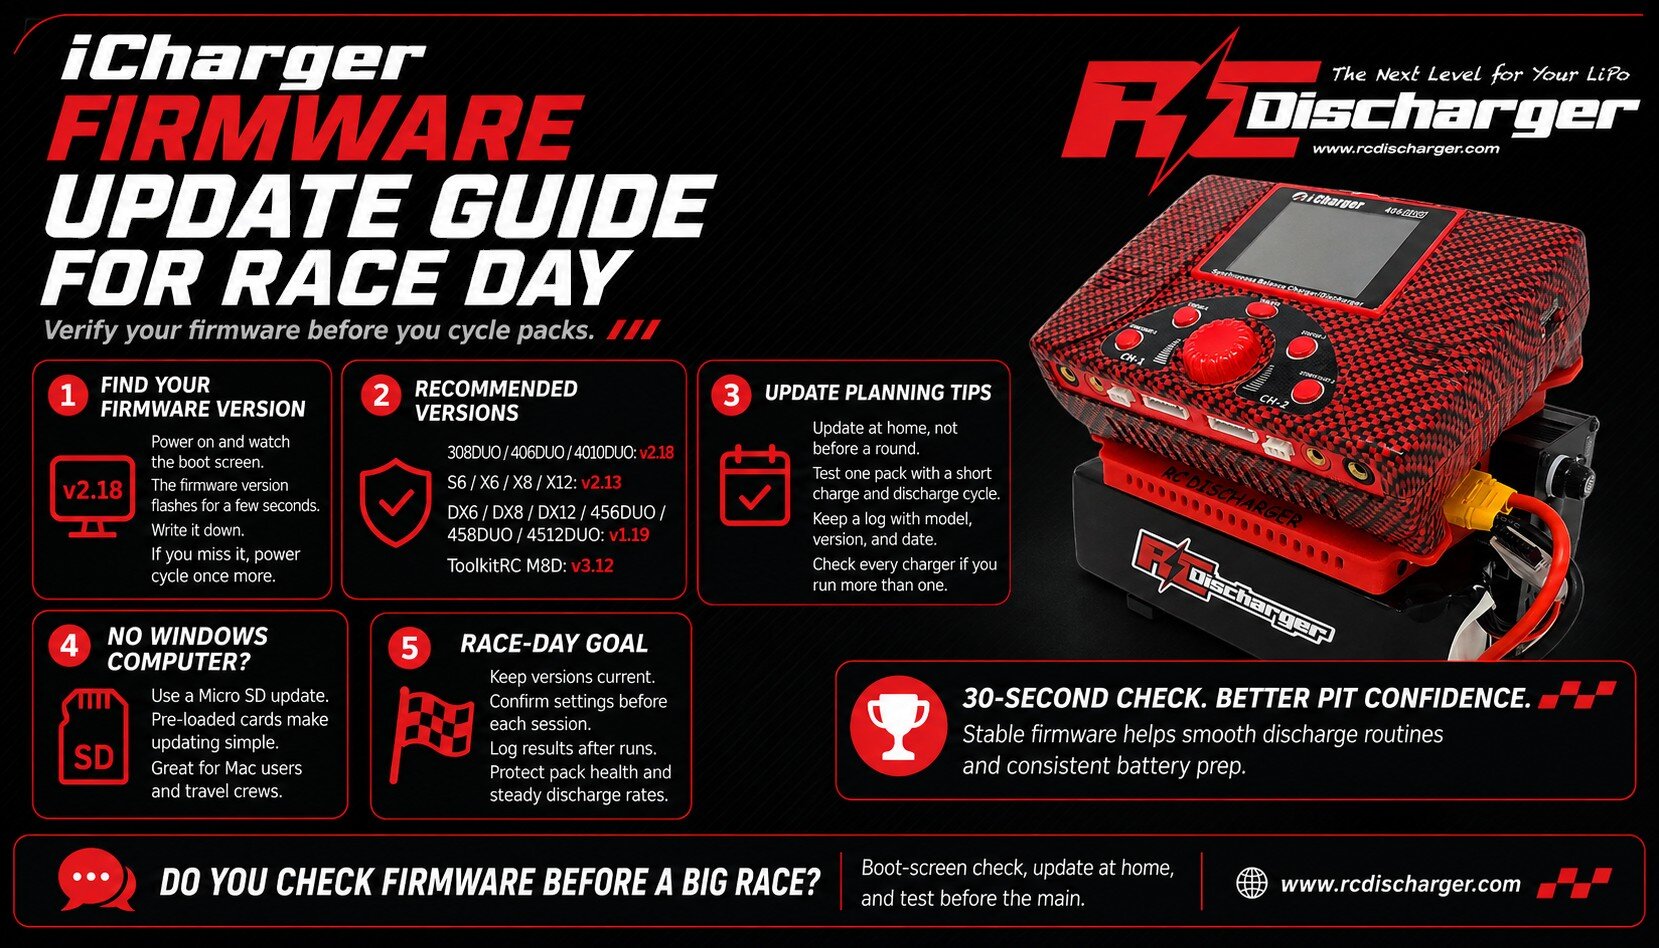
First, power on your charger and watch the screen right away. During boot, the firmware version flashes for a few seconds. Then, write it down so you can compare it to your target version. If you miss the flash, simply power cycle once more.

Consequently, you confirm the version without digging through menus. In addition, this habit keeps your routine consistent from practice to mains. Finally, you reduce last-minute surprises when you swap packs fast.

Recommended firmware versions for race reliability

Next, match your charger model to a proven version before a big weekend. Notably, stable firmware helps prevent glitches during discharge routines. Furthermore, consistent versions reduce surprises when you move between chargers.

blank

  • v2.18 for iCharger 308DUO, 406DUO, 4010DUO
  • v2.13 for iCharger S6, X6, X8, X12
  • v1.19 for iCharger DX6, DX8, DX12, 456DUO, 458DUO, 4512DUO
  • v3.12 for ToolkitRC M8D

However, if your version differs, plan the update before your next major event. Similarly, if you run multiple chargers, check each one to avoid mixed behavior. For reference, review firmware for embedded electronics and see why version control matters.

Update planning tips that prevent pit-day problems

First, update at home, not five minutes before a round. Then, run a short charge and discharge test on one pack. As a result, you confirm stable communication before you commit to a full conditioning cycle.

Additionally, keep a simple log with charger model, firmware version, and date. Consequently, you spot changes quickly if behavior shifts. Moreover, you can match results across events and track conditions.

  1. Charge one pack at your normal race rate.
  2. Run a brief discharge step and watch for errors.
  3. Confirm leads, balance taps, and connectors stay snug.
  4. Finally, repeat once with a second pack for confidence.

No Windows computer? Use a Micro SD update

Updating an iCharger often needs a Windows PC. Nevertheless, you can still update quickly at home or at the track. Therefore, many racers keep a dedicated Micro SD option in their pit box for fast recovery.

The iCharger Firmware Update Micro SD Card offers a simple path to current firmware. In fact, we can ship a pre-loaded Micro SD card so you update directly without a computer. Consequently, Mac users and travel crews stay ready for race day.

Get the SD Card or download the files here: iCharger Firmware Update Micro SD Card from RC Discharger

Finally, confirm versions before each session and log results after runs. As a result, you protect pack health, maintain steady discharge rates, and keep your program sharp for the main.

Track-side iCharger and battery conditioning setup photo

Recommended iCharger firmware version chart image

iCharger USB PD Fast Power Guide

iCharger USB PD for fast pit power

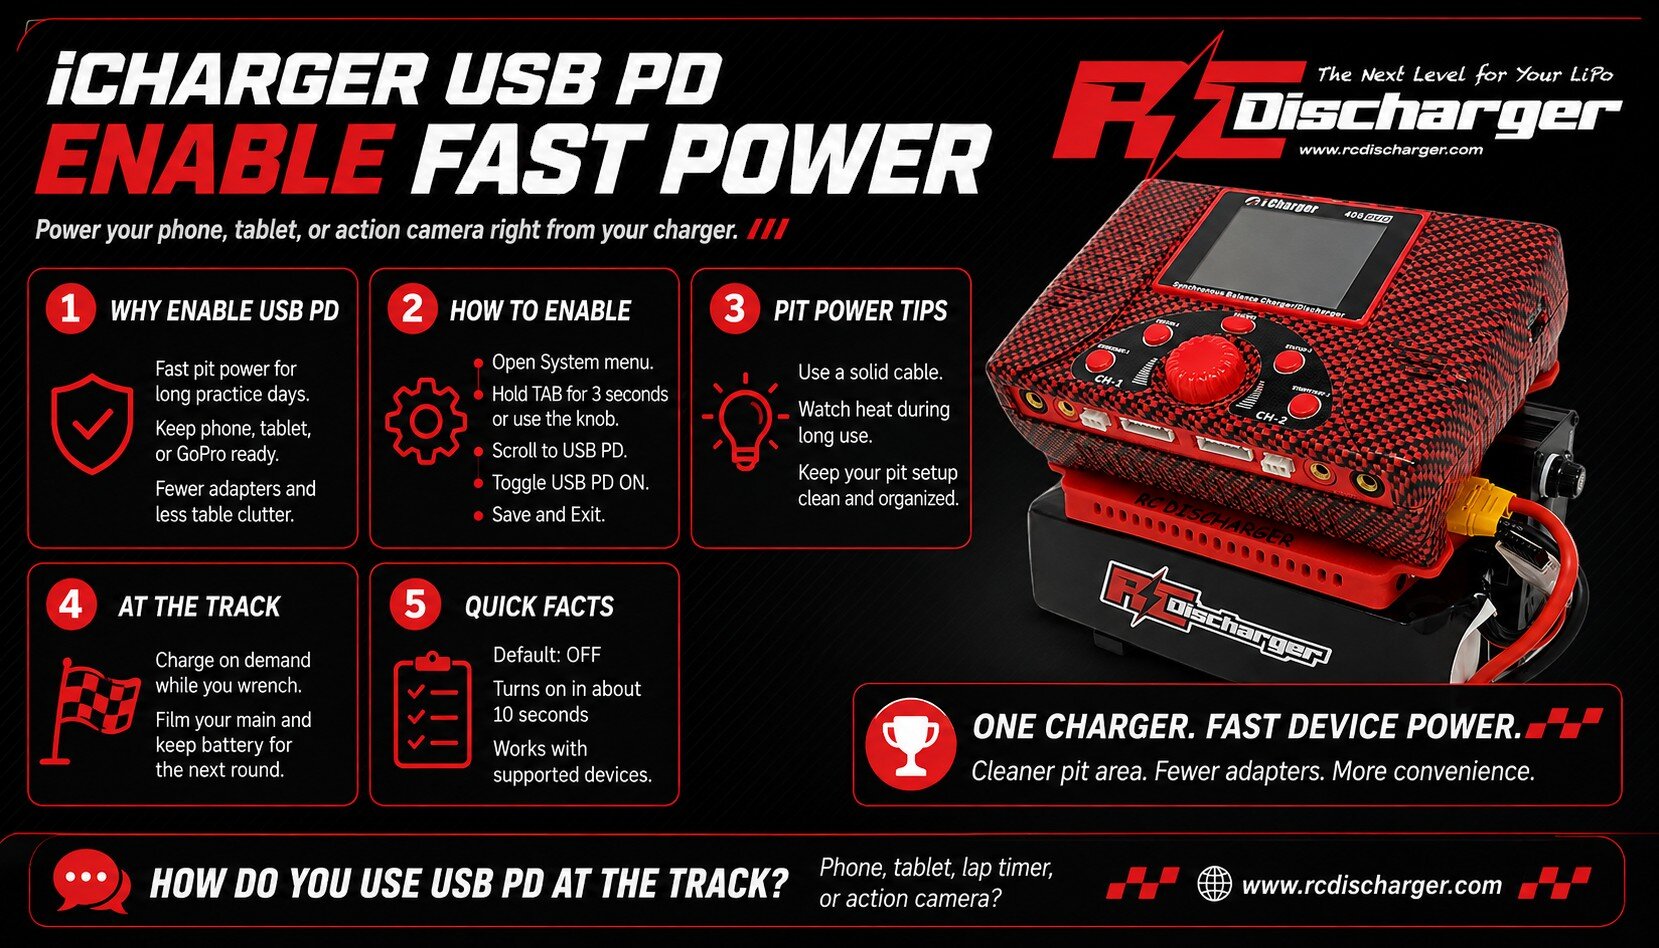
iCharger USB PD turns your charger into a fast power source at the track. By default, iCharger keeps the USB port off for charge control. However, you can enable Power Delivery in seconds. As a result, you stop searching for wall outlets in the pits. Instead, you power a phone, tablet, or action camera from one device.

Moreover, this simple setting helps when you run long practice days. Consequently, you keep timing apps, race notes, and video ready between rounds. Additionally, you reduce the number of adapters on your table. Therefore, your pit area stays cleaner and easier to manage.

Why enable USB Power Delivery

First, fast USB power keeps your gear alive during busy race schedules. For example, you can top off a lap timer while you wrench. Also, you can keep a tablet running for setup sheets and live timing. In addition, you can charge an action camera between heats without swapping batteries.

  • Charge on demand: Power devices while you work on the car.
  • Fewer dead batteries: Keep filming, timing, and messaging all day.
  • Cleaner pit area: Use one power source instead of many bricks.

Notably, Power Delivery can supply higher power than basic USB charging. Therefore, compatible devices often charge much faster. Meanwhile, a quality cable helps maintain stable power and lower heat.

blank

How to enable iCharger USB PD

Next, enable the feature from your System menu. However, button names can vary by model. Therefore, follow the steps below and match them to your charger’s controls.

  1. Access System Menu: Press and hold the Tab button for 3 seconds. Alternatively, use the Control Knob on DX6, DX8, or DX12 models.
  2. Navigate: Then scroll down to the USB PD setting.
  3. Activate: Now toggle it to USB PD ON.
  4. Finish: Finally, choose Save and Exit to keep the change.

Afterwards, plug in your USB-C cable and confirm your device starts fast charging. In addition, keep connectors clean and fully seated to avoid dropouts. Also, choose a short, high-quality cable when possible for better results.

Tips for safe, consistent track charging

First, watch cable temperature during high-power charging. Additionally, keep the charger ventilated and away from direct sun. Consequently, you protect both the charger and your devices. Finally, if a device charges slowly, try another cable or lower screen brightness.

For context, USB Power Delivery negotiates voltage and current for faster charging on supported devices. Moreover, you can review details on USB Power Delivery specifications.

Stay powered up all race day

Ultimately, you can film your main and still have battery for the next round. Meanwhile, you keep your pit simple with fewer chargers and bricks. As a result, you spend less time managing power and more time racing.

iCharger USB PD trackside charging setup image

1/28 LiPo cycling for peak power

1/28 LiPo cycling for peak power

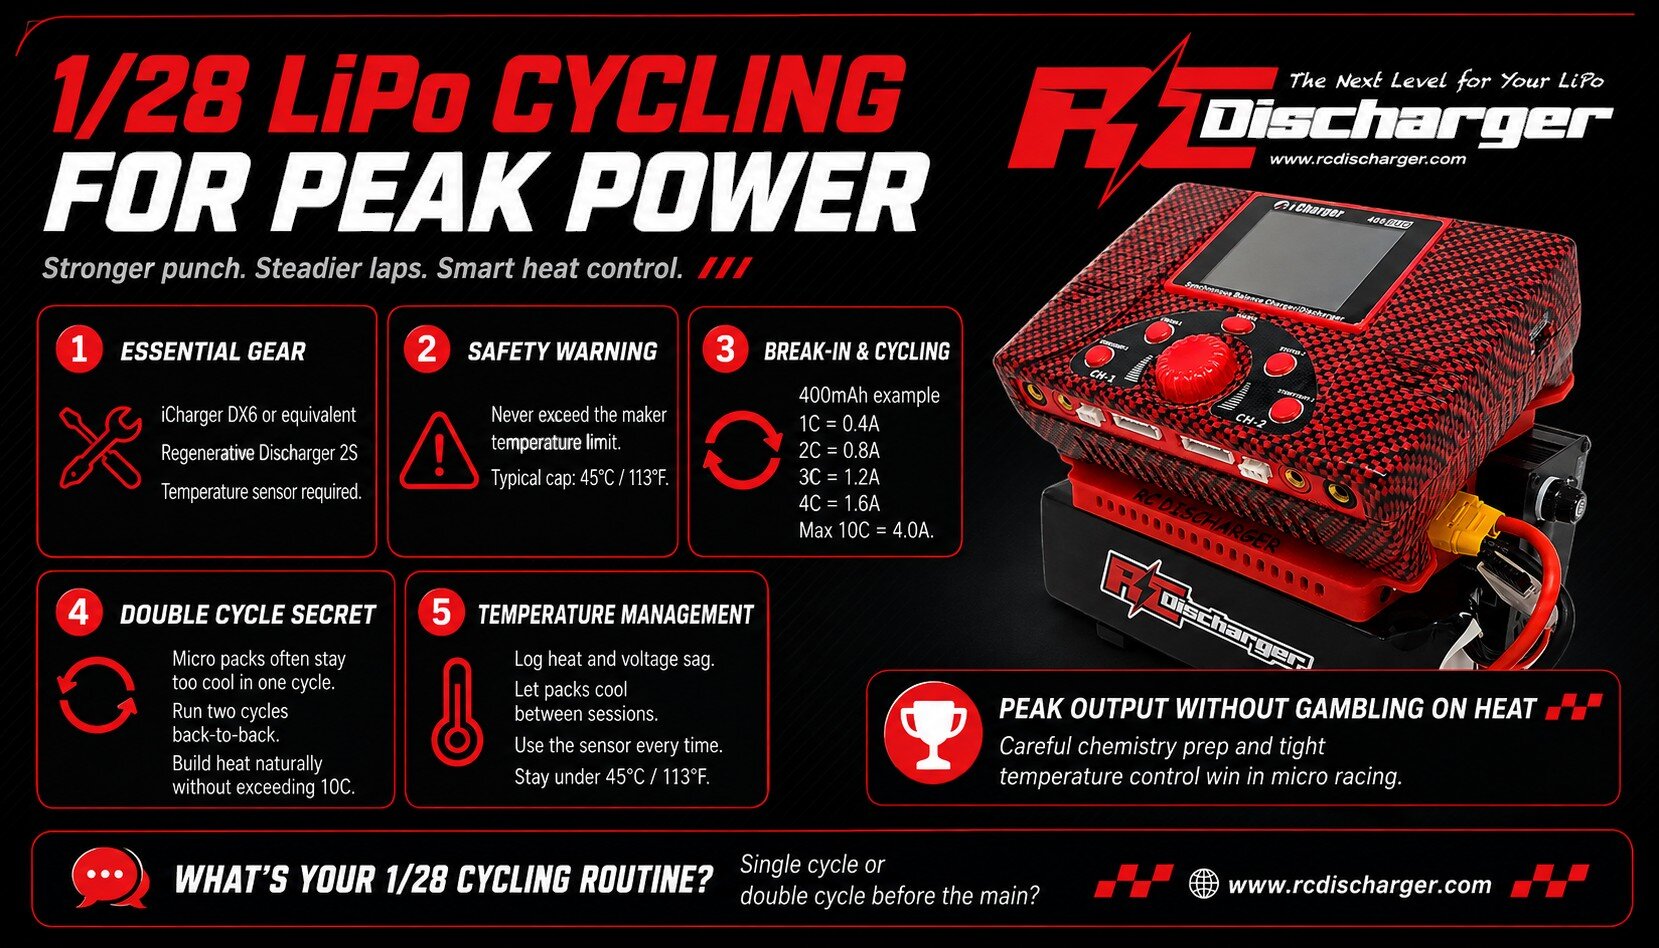
1/28 LiPo cycling helps you unlock harder punch and steadier laps in micro racing. Moreover, it supports a repeatable routine and tight heat control. Therefore, you can chase fast times without gambling on temperature spikes.

First, set a simple process you can repeat at every track. Additionally, keep notes so you compare packs fairly. As a result, you trust your data instead of guesses.

Essential gear for consistent results

Before you start, gather tools that keep every run stable. In addition, match your equipment to your scale and current targets. Consequently, you reduce variables between packs.

  • The charger: Run an iCharger DX6 or an equivalent charger with solid logging.
  • The discharger: Use a Regenerative Discharger 2S for 1/28 to 1/12 scale. Alternatively, choose a Regenerative Discharger 4S Off-Road if you race up to 1/10 scale.
  • The safety net: You must use our Temperature Sensor. Notably, temperature control drives safety and repeatability.

Safety warning: Never exceed the manufacturer temperature limit. Typically, that cap sits near 45°C (113°F).

blank

Break-in and cycling procedure

Next, break in new or un-cycled packs before you push race amps. Specifically, ramp current in small steps so the chemistry adapts. As a result, voltage holds longer under load.

Use a gradual sequence based on capacity. For example, a 400mAh pack uses the currents below. Then, stop increasing if temperature rises too quickly.

  • Step 1: Start at 1C (0.4A for 400mAh).
  • Step 2: Move to 2C (0.8A).
  • Step 3: Increase to 3C (1.2A).
  • Step 4: Continue to 4C (1.6A) and so on.
  • Maximum limit: Never exceed 10C maximum (4.0A for 400mAh).

Meanwhile, log each run so you spot trends in sag and heat. Furthermore, keep connectors, leads, and adapter lengths consistent. Consequently, your numbers stay comparable across sessions.

The 1/28 scale secret: double cycle

However, micro packs often stay too cool during a single cycle. Therefore, one pass may not warm the chemistry enough for full conditioning. In fact, that can make lap one feel flat.

Instead, run a double cycle back-to-back when conditions allow it. Additionally, this approach builds heat naturally without breaking the 10C limit. As a result, you reach stronger output while staying within safe current.

Critical temperature management

Finally, ambient temperature dictates how many amps you can run safely. Consequently, let packs cool between sessions, especially on hot days. Moreover, use a sensor every time and stay under 45°C (113°F).

Additionally, place the probe the same way on every pack for consistent readings. Then, stop early if you see fast temperature climb or sudden voltage drop. Ultimately, consistency wins more mains than risky peak numbers.

Ready to upgrade your pit station? Shop our iCharger temperature sensor for LiPo battery safety and build repeatable pace. Moreover, review lithium polymer battery chemistry basics so you understand why heat control matters.

C Rating Explained for RC Charging

C Rating Explained: RC Charge Math

C Rating Explained gives you a simple way to charge safely and keep packs strong. First, match charge amps to your pack capacity. Moreover, the label numbers often look confusing. However, the math stays easy once you run one example. Therefore, you protect cell health, limit heat, and keep performance consistent.

What a C rating tells you

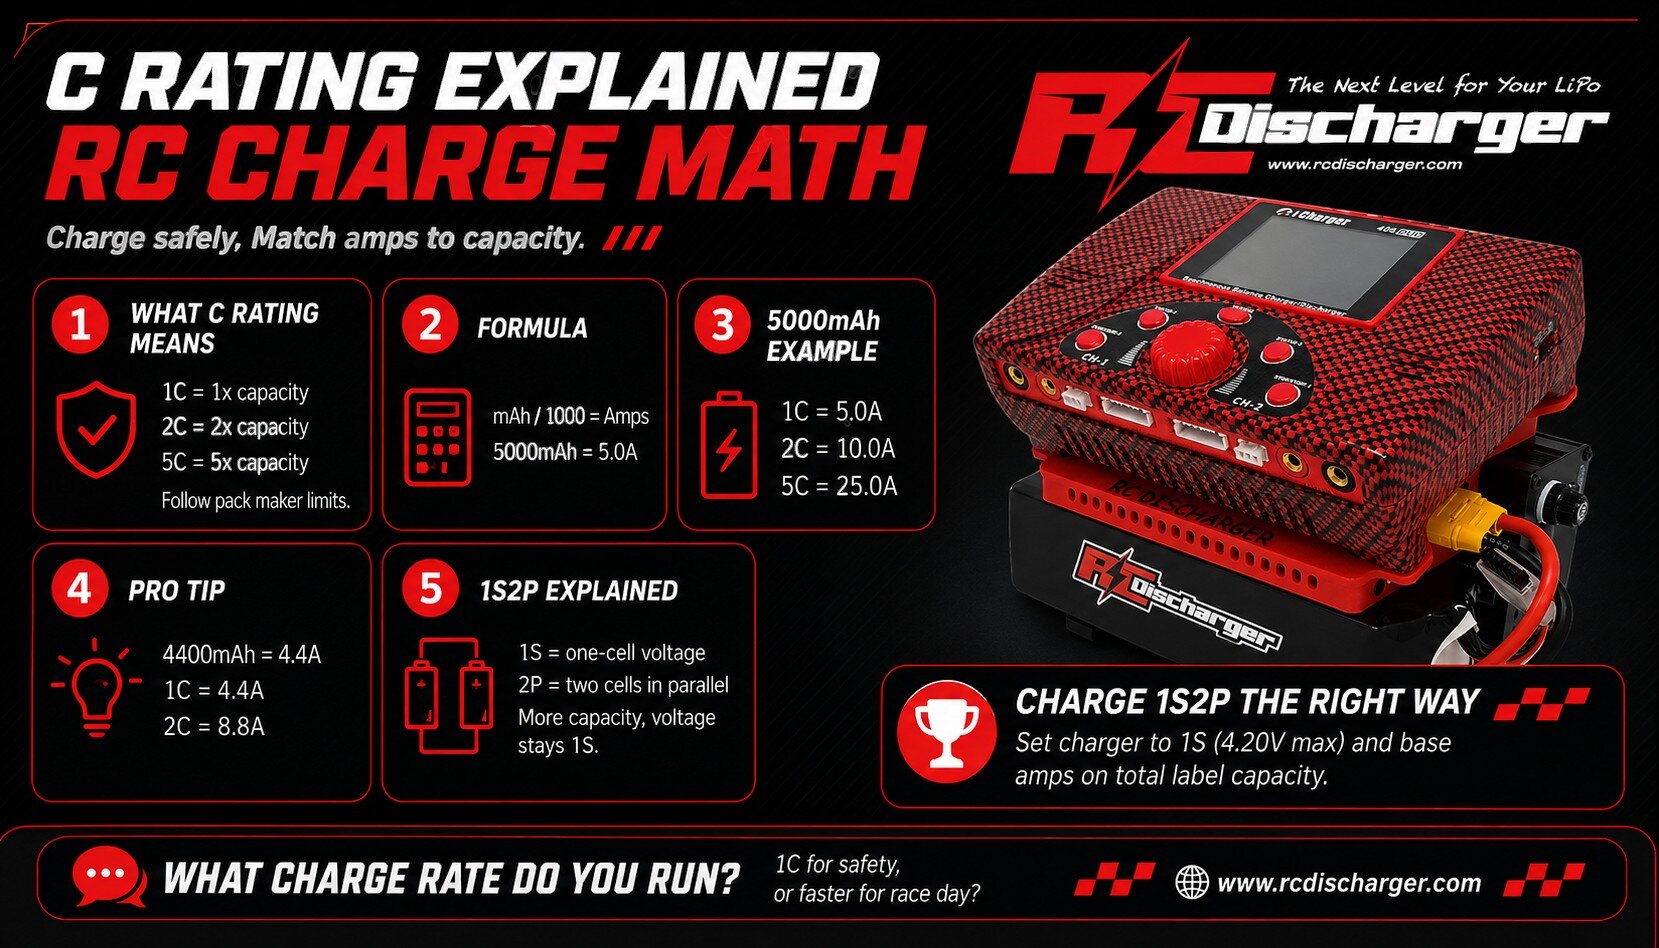
Specifically, 1C equals one times your battery capacity in amps. For example, a 5000mAh pack equals 5.0A at 1C. Similarly, higher C values raise the allowed charge current. However, always follow the limit printed by the pack maker. In addition, use common sense when packs feel hot.

  • 1C = 1× capacity, so you get a standard safe charge rate.
  • 2C = 2× capacity, so you finish sooner.
  • 5C = 5× capacity, so quality race packs charge very fast.

Notably, faster charging can raise heat and stress. Therefore, check pack temperature during the first minutes. Also, stop and cool the pack if temperature climbs quickly. Additionally, use a quality charger, short leads, and tight connectors.

How to calculate charge amps

blank

First, convert milliamp-hours to amps. Then, multiply by the C rate you want. Consequently, you get the correct charger current setting. In fact, this one step prevents most charging mistakes.

  • Formula: mAh ÷ 1000 = Amps

Example: 5000mAh becomes 5.0A. Therefore, 1C equals 5.0A, and 2C equals 10.0A. Similarly, 5C equals 25.0A if your pack allows it.

  • 1C charge rate: 5.0A (5.0 × 1)
  • 2C charge rate: 10.0A (5.0 × 2)
  • 5C charge rate: 25.0A (5.0 × 5)

Additionally, 4400mAh equals 4.4A. Thus, 1C equals 4.4A and 2C equals 8.8A. For extra background, you can review lithium polymer battery charging basics. Moreover, that overview explains why heat control matters.

What 1S2P means in race packs

Next, you may see 1S2P on 1/12 or GT12 packs. Although it looks technical, it simply describes internal wiring. Consequently, it tells you how voltage and capacity behave. Also, it helps you set your charger correctly.

  • 1S (series): sets voltage, so it matches one cell (3.7V nominal, 4.2V max).
  • 2P (parallel): sets capacity, so two cells share the load side by side.

Importantly, parallel wiring doubles capacity and lowers internal resistance. As a result, you often get more runtime and stronger punch. However, voltage stays the same as a normal 1S pack. Therefore, charge it like one larger 1S battery and base amps on total label capacity.

  • Voltage setup: set your charger to 1S (4.20V max).
  • Amps setup: calculate C from the total capacity on the label.

Finally, C Rating Explained helps you choose amps with confidence. Moreover, that simple habit supports longer pack life and steadier on-track performance.

https://www.rcdischarger.com/wp-content/uploads/2026/02/ChatGPT-Image-Aug-1-2026-03_57_36-AM-2.png

iCharger firmware update stability

iCharger firmware update stability rule

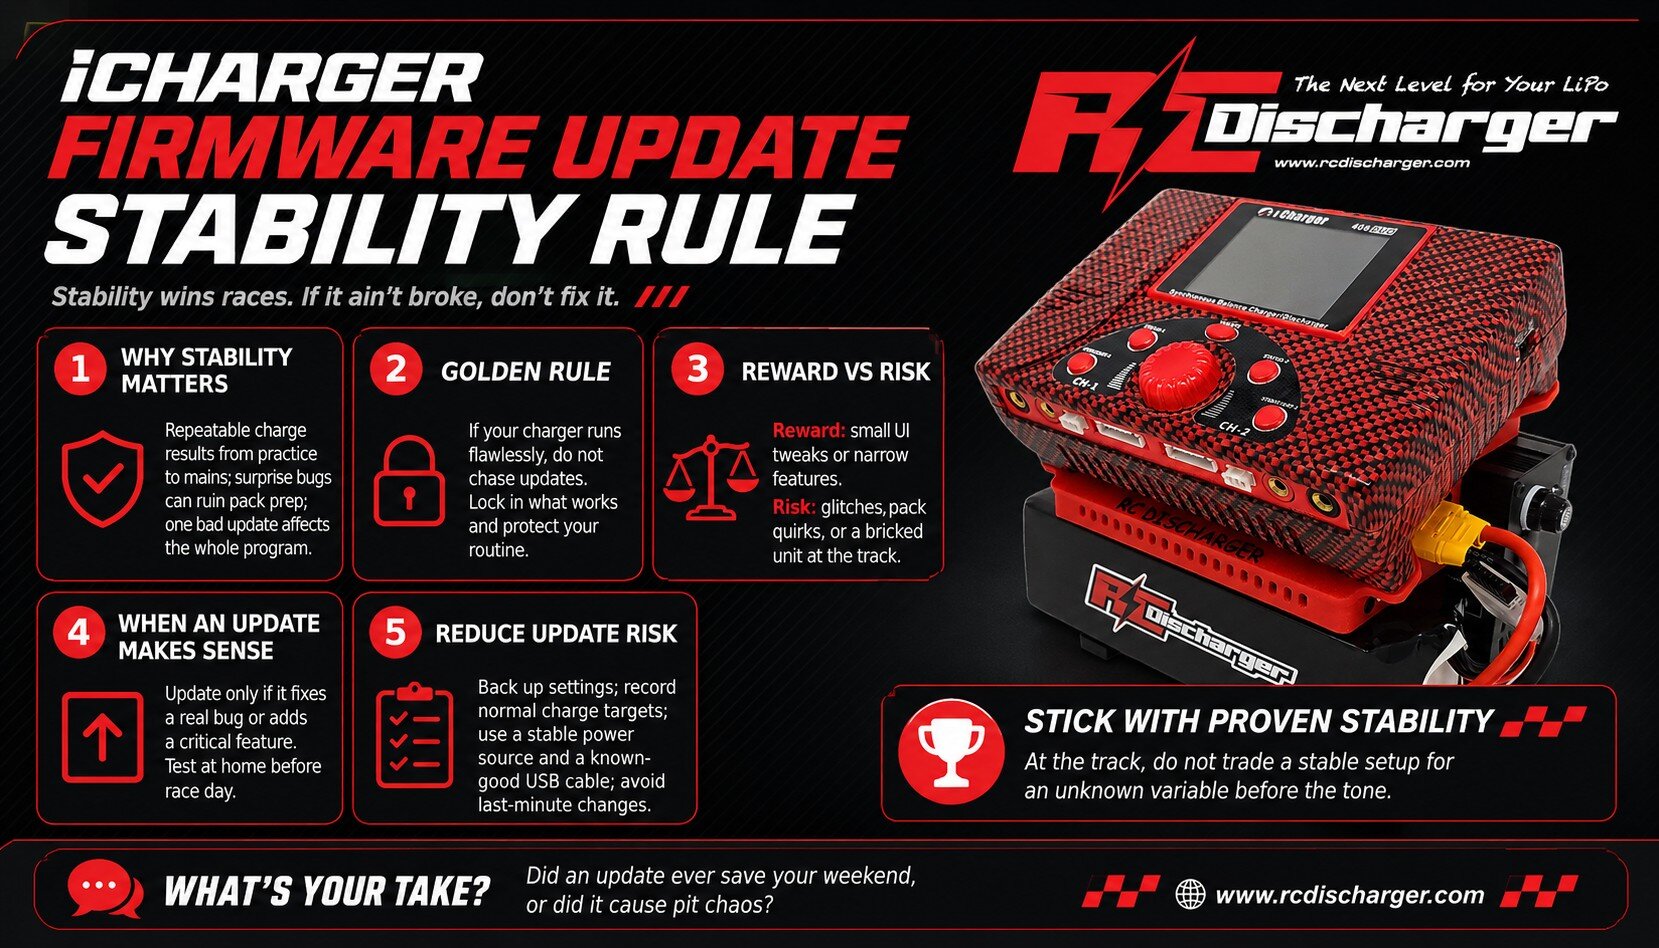
An iCharger firmware update can add features, however stability wins races. Therefore, the RC Discharger team follows one track-proven rule: if it ain’t broke, don’t fix it. Moreover, many racers update because they want the newest menus or options. Nevertheless, firmware changes can add risk right before a big event.

In fact, your charger sits at the center of every battery choice you make. Consequently, one surprise bug can shake your routine fast. Additionally, a bad change can cost time, confidence, and results.

Why stability matters on race day

First, you need repeatable charge results from practice to mains. As a result, a sudden behavior change can ruin pack prep and focus. Moreover, racers often tune by small margins, so consistency matters most.

On the other hand, new firmware may shift how the charger reports voltage, internal resistance, or cutoff behavior. Therefore, your notes from last week may stop matching today. Ultimately, stability protects your baseline.

The golden rule of firmware

If your charger runs flawlessly, then you do not need to chase updates. Instead, lock in what works and protect your routine. Furthermore, keep your race-week prep boring and predictable.

blank

  • The reward: Usually small UI tweaks or narrow features you may never use.
  • The risk: Glitches, older pack quirks, or even a bricked unit at the track.

When an update makes sense

Only install an iCharger firmware update when it solves a real problem. Specifically, look for clear release notes and a direct match to your issue. Additionally, treat updates like a setup change, not a casual click.

  1. First, update if it fixes a bug you face right now.
  2. Second, update if it adds a critical feature your program needs.
  3. Finally, update if the manufacturer documents a safety fix you should not ignore.

Additionally, test at home before race day. Then, run a full charge and storage cycle on a practice pack. Next, compare results against your normal notes.

How to reduce update risk

Before you start, back up settings and record your normal charge targets. Next, use a stable power source and a known-good USB cable. Furthermore, read a neutral overview of firmware update safety basics so you understand the risks. Finally, avoid last-minute changes the night before a major race.

Likewise, keep one “control” pack for testing after any change. Consequently, you can spot odd heat, timing shifts, or early cutoff behavior. Therefore, you protect the packs you plan to race.

Stick with proven stability

At the track, you want your gear to act like it did yesterday. Therefore, do not trade a stable setup for an unknown variable before the tone. Moreover, if you must update, do it early in the week and validate every step.

Ultimately, consistency helps you extract maximum power and longer pack life. If you want your batteries to deliver the same punch run after run, keep the charger routine steady and focus on conditioning. As a result, you arrive on the driver stand with confidence, not questions.

View the iCharger firmware update stability image

RC Discharger