
Resistor bank setup for iCharger

Resistor bank setup for iCharger DUO

Resistor bank setup starts with correct wiring and the right menu choices on your iCharger DUO. Therefore, you get repeatable 40A pulls and cleaner battery data. Moreover, you gain better punch and more consistency on race day.

First, use this method on iCharger DUO models like 308DUO, 406DUO, 4010DUO, 456DUO, 458DUO, and 4512DUO. Next, plan your bench for airflow and safe cable routing. Consequently, you avoid heat soak and reduce voltage drop during high current runs.

Step-by-step configuration for 40A

Before you start, confirm your firmware version and match balance leads to your pack type. Additionally, place the resistor bank where it can shed heat away from your batteries. Then, follow these steps in order for stable results.

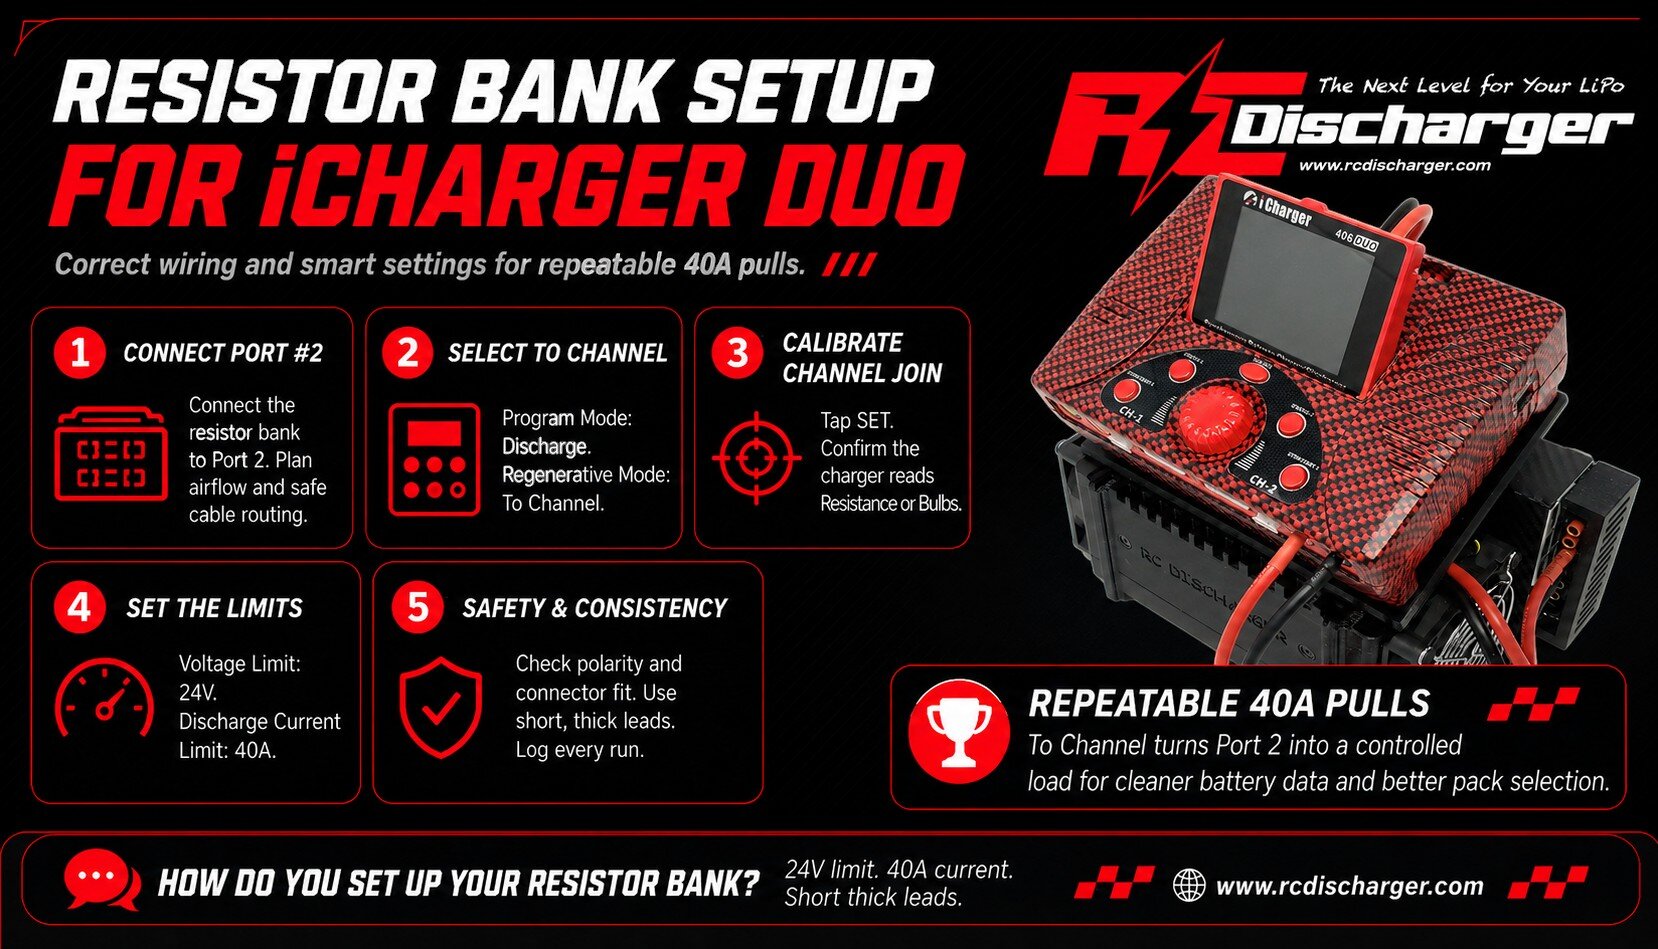
  1. Physical connection: Connect your resistor bank to Port #2 of your iCharger DUO.
  2. Program mode: Open the menu and select Discharge under Program Mode.
  3. Regenerative mode: Scroll to Regenerative Mode and choose To Channel. As a result, the charger routes energy into the resistor bank on the other port.
  4. Calibrate (Channel Join): Tap SET to calibrate. Next, under Channel Join, confirm the iCharger reads Resistance or Bulbs.
  5. Voltage limit: Set Voltage Limit to 24V.
  6. Current limit: Set Discharge Current Limit to 40 Amps.
Why these settings improve your data

When you choose To Channel, you turn Port 2 into a controlled energy sink. Consequently, Port 1 pulls higher current through your race pack without hitting low limits. Moreover, your discharge curve matches race loads more closely, so your data helps you choose better packs.

In addition, 40A pulls expose weak solder joints, tired connectors, and undersized leads quickly. Therefore, you can fix resistance sources before race day and control voltage sag. Similarly, you can compare packs with the same method and spot the one that holds voltage longer.

Safety and consistency tips

First, check polarity and connector fit before you press Start. Next, keep the resistor bank ventilated and off carpet or foam. Also, stop the run if you smell hot insulation or see unstable current.

  • Use short, thick leads: Consequently, you reduce voltage drop and heat.
  • Log your runs: Then, you can compare curves across packs and days.
  • Keep pack temperatures consistent: Therefore, your results stay fair and repeatable.

Finally, if you want deeper background on how resistors convert electrical energy into heat, review resistor electrical load behavior before long, high-amp sessions. Ultimately, Resistor bank setup helps you test smarter, tune faster, and race with more confidence.
Reference image for Port 2 resistor bank wiring

1/28 LiPo cycling for peak power

1/28 LiPo cycling for peak power

1/28 LiPo cycling helps you unlock harder punch and steadier laps in micro racing. Moreover, it supports a repeatable routine and tight heat control. Therefore, you can chase fast times without gambling on temperature spikes.

First, set a simple process you can repeat at every track. Additionally, keep notes so you compare packs fairly. As a result, you trust your data instead of guesses.

Essential gear for consistent results

Before you start, gather tools that keep every run stable. In addition, match your equipment to your scale and current targets. Consequently, you reduce variables between packs.

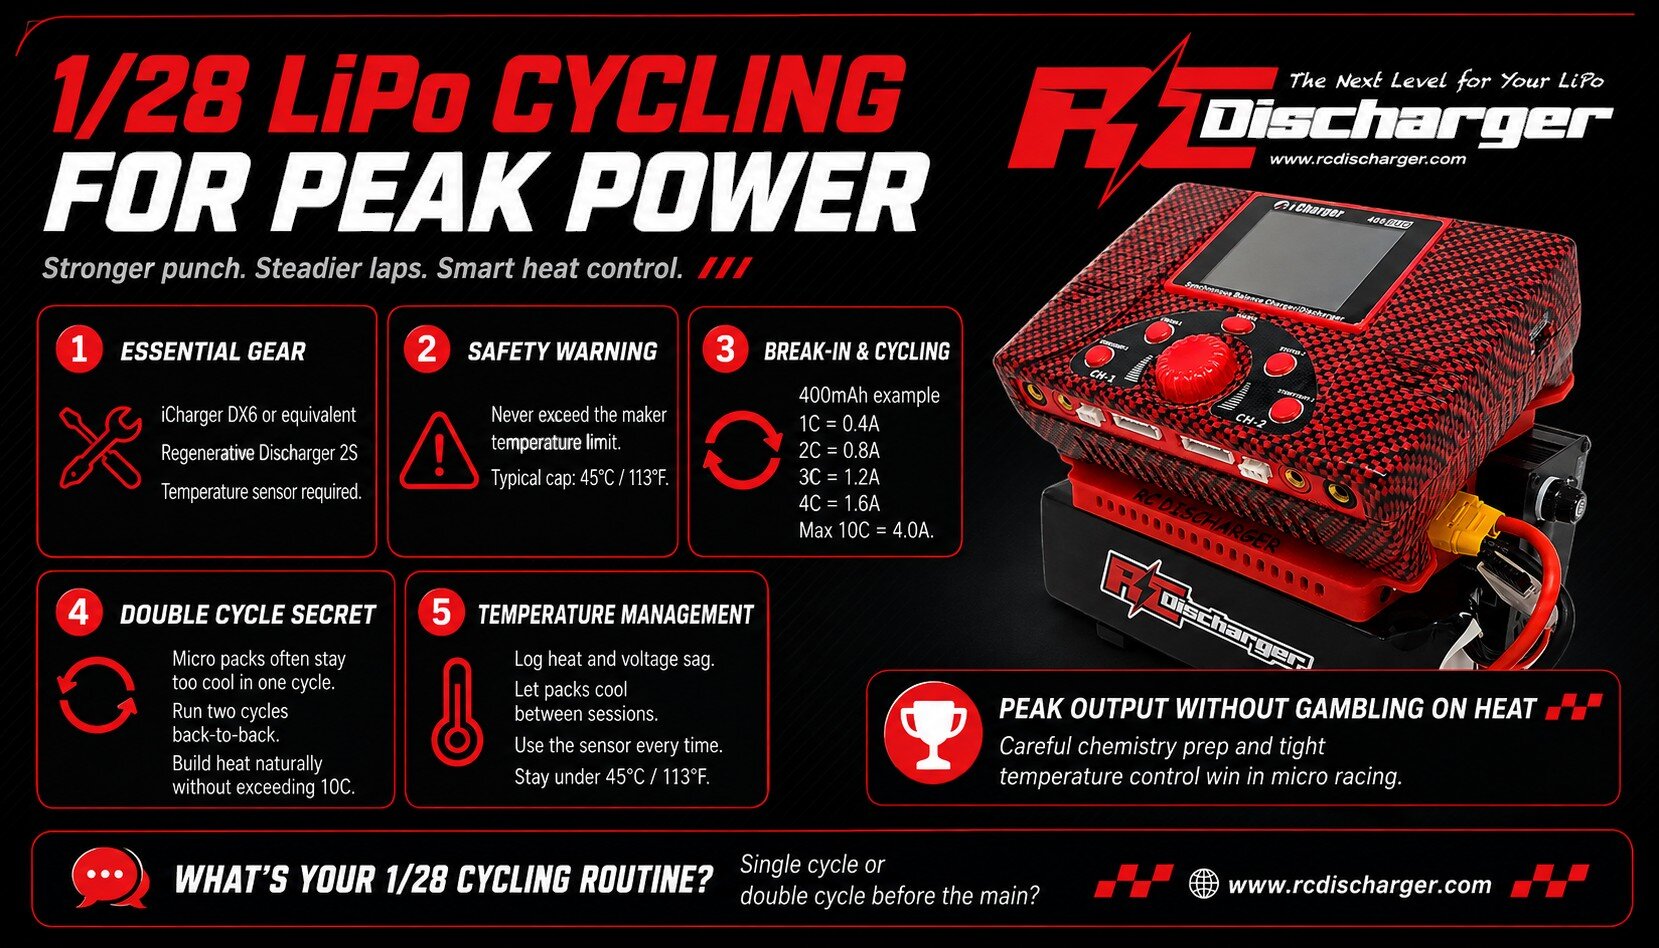
  • The charger: Run an iCharger DX6 or an equivalent charger with solid logging.
  • The discharger: Use a Regenerative Discharger 2S for 1/28 to 1/12 scale. Alternatively, choose a Regenerative Discharger 4S Off-Road if you race up to 1/10 scale.
  • The safety net: You must use our Temperature Sensor. Notably, temperature control drives safety and repeatability.

Safety warning: Never exceed the manufacturer temperature limit. Typically, that cap sits near 45°C (113°F).

Break-in and cycling procedure

Next, break in new or un-cycled packs before you push race amps. Specifically, ramp current in small steps so the chemistry adapts. As a result, voltage holds longer under load.

Use a gradual sequence based on capacity. For example, a 400mAh pack uses the currents below. Then, stop increasing if temperature rises too quickly.

  • Step 1: Start at 1C (0.4A for 400mAh).
  • Step 2: Move to 2C (0.8A).
  • Step 3: Increase to 3C (1.2A).
  • Step 4: Continue to 4C (1.6A) and so on.
  • Maximum limit: Never exceed 10C maximum (4.0A for 400mAh).

Meanwhile, log each run so you spot trends in sag and heat. Furthermore, keep connectors, leads, and adapter lengths consistent. Consequently, your numbers stay comparable across sessions.

The 1/28 scale secret: double cycle

However, micro packs often stay too cool during a single cycle. Therefore, one pass may not warm the chemistry enough for full conditioning. In fact, that can make lap one feel flat.

Instead, run a double cycle back-to-back when conditions allow it. Additionally, this approach builds heat naturally without breaking the 10C limit. As a result, you reach stronger output while staying within safe current.

Critical temperature management

Finally, ambient temperature dictates how many amps you can run safely. Consequently, let packs cool between sessions, especially on hot days. Moreover, use a sensor every time and stay under 45°C (113°F).

Additionally, place the probe the same way on every pack for consistent readings. Then, stop early if you see fast temperature climb or sudden voltage drop. Ultimately, consistency wins more mains than risky peak numbers.

Ready to upgrade your pit station? Shop our iCharger temperature sensor for LiPo battery safety and build repeatable pace. Moreover, review lithium polymer battery chemistry basics so you understand why heat control matters.

RC Discharger