1/28 LiPo Cycling Guide for Racing

1/28 LiPo cycling for Peak Power

1/28 LiPo cycling helps you hit stronger punch and steadier laps in micro racing. Moreover, it rewards careful chemistry prep and tight temperature control. Therefore, you can chase track records without gambling on heat.

First, thank you to the global drivers who used these steps for TQs and podiums. Additionally, this guide breaks the process into simple, repeatable actions. As a result, you can build a routine that travels well.

Essential gear for consistent results

Before you start, gather the tools that keep your process stable. In addition, choose equipment that matches your scale and current needs. Consequently, you avoid guesswork between packs.

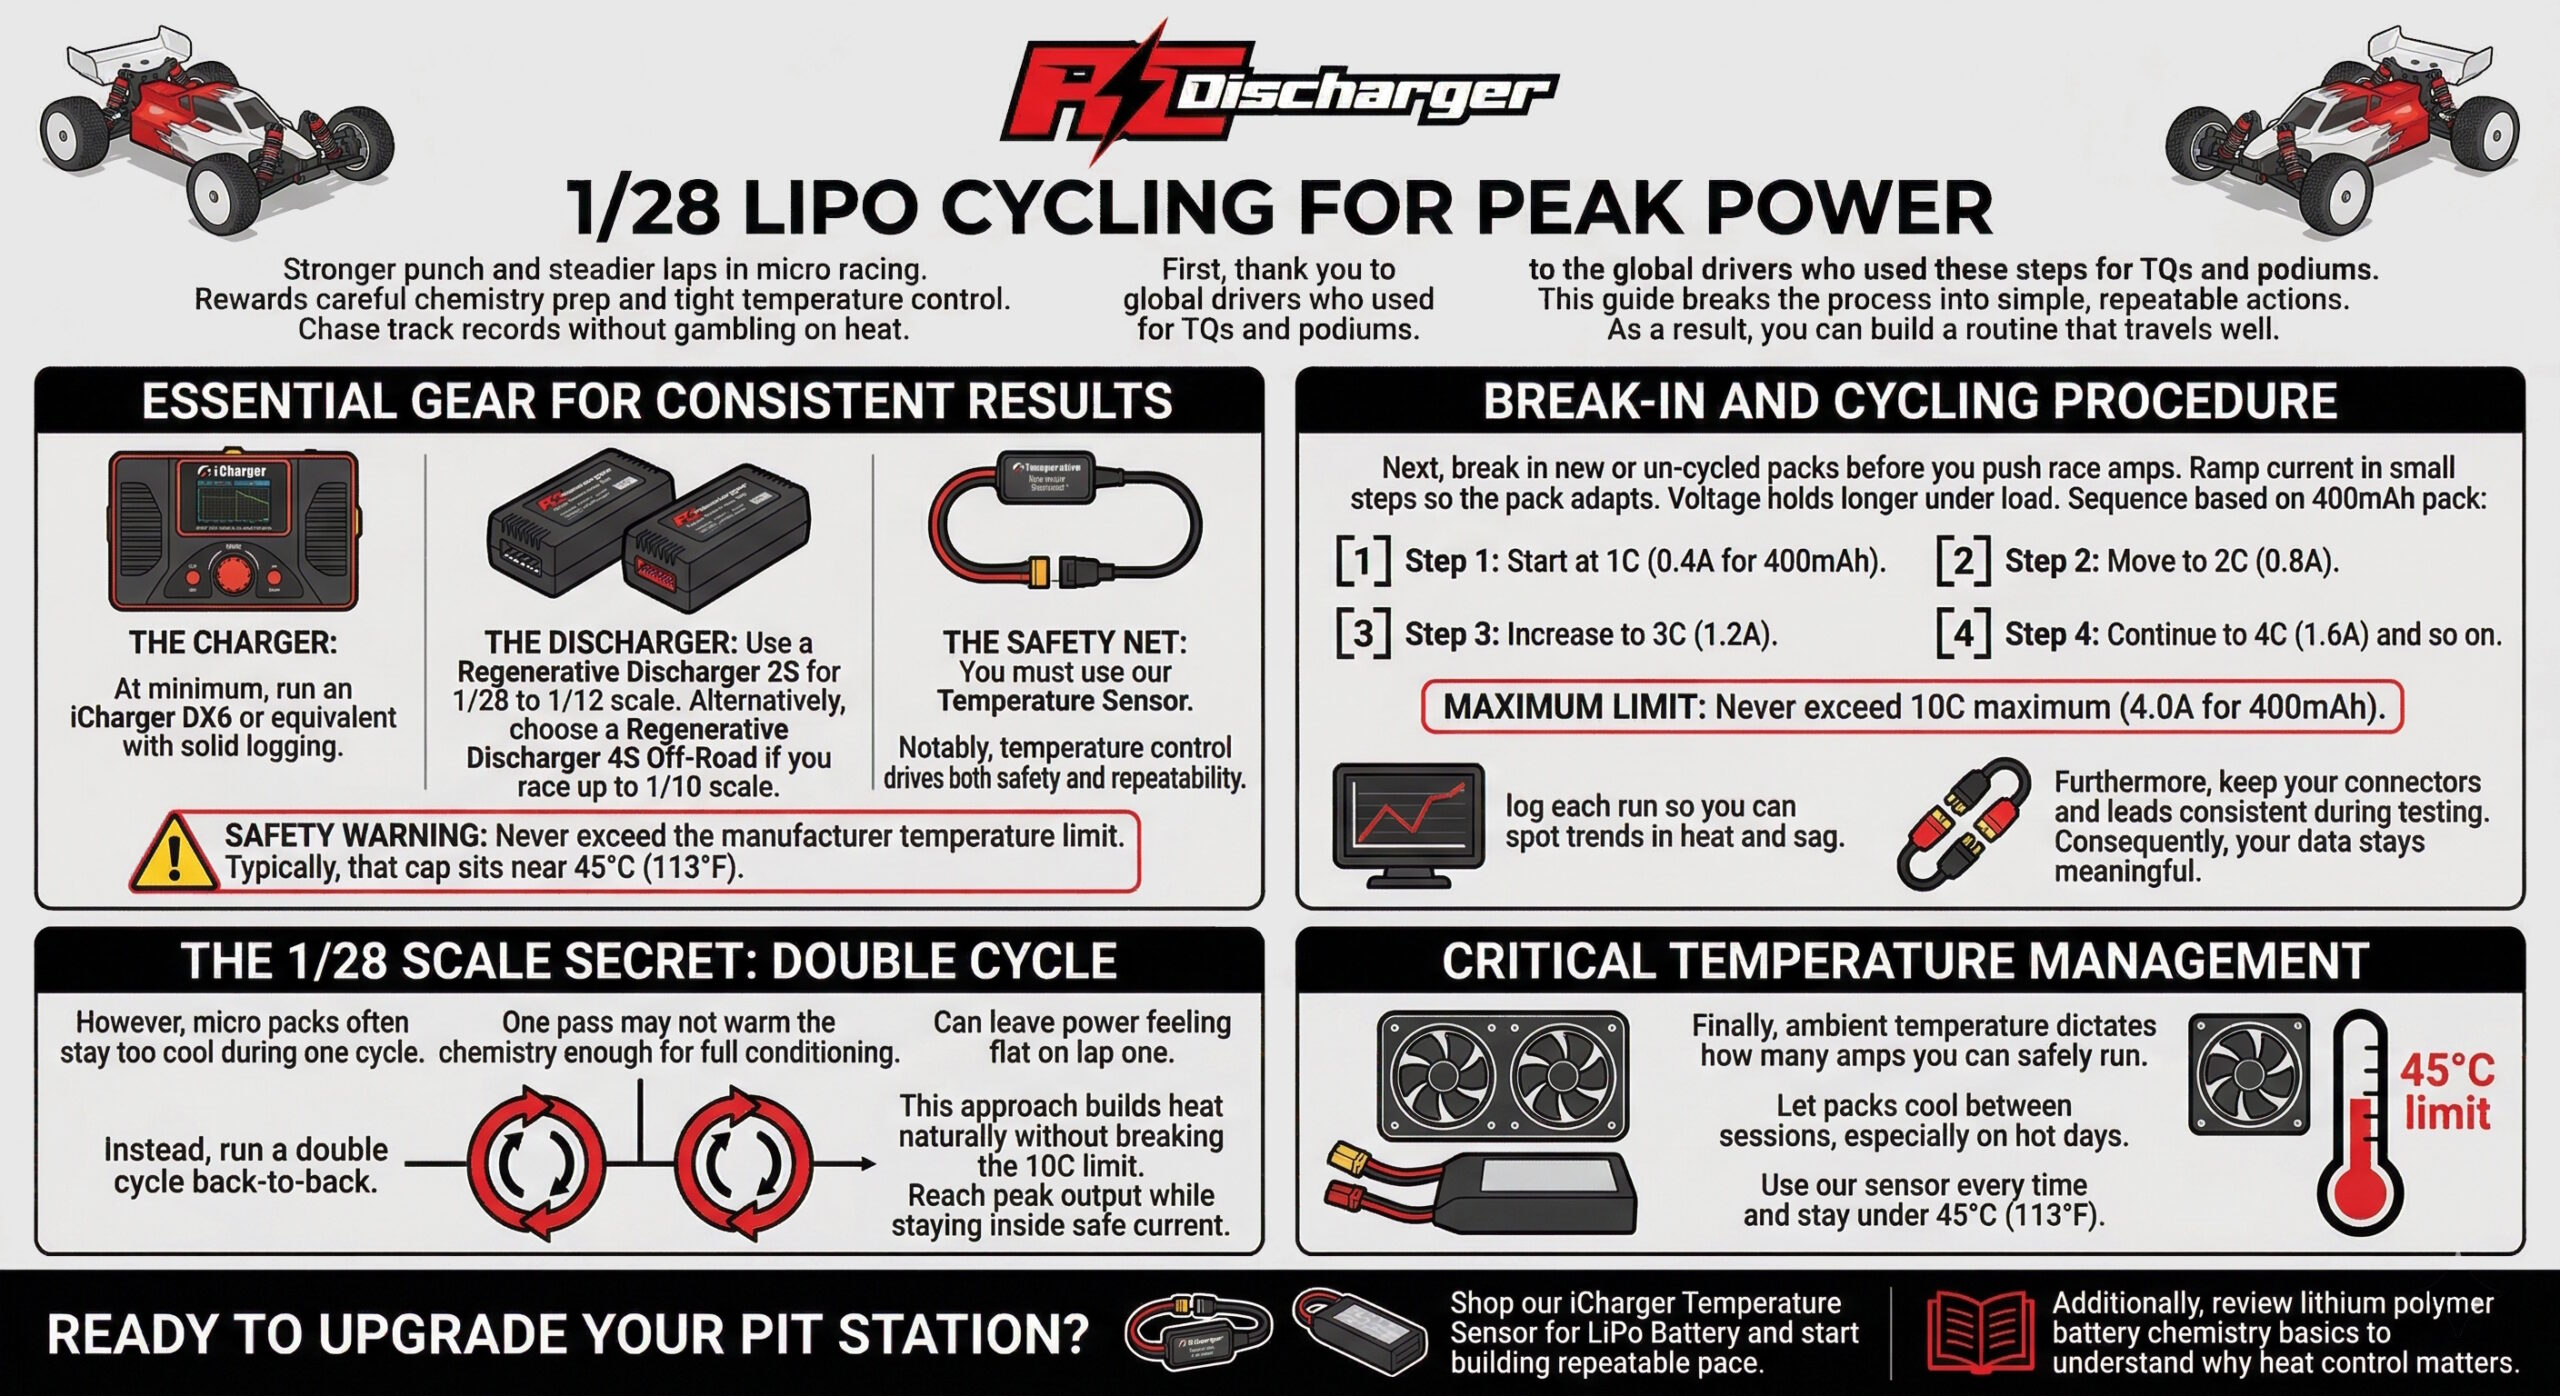
  • The charger: At minimum, run an iCharger DX6 or equivalent with solid logging.
  • The discharger: Use a Regenerative Discharger 2S for 1/28 to 1/12 scale. Alternatively, choose a Regenerative Discharger 4S Off-Road if you race up to 1/10 scale.
  • The safety net: You must use our Temperature Sensor. Notably, temperature control drives both safety and repeatability.

Safety warning: Never exceed the manufacturer temperature limit. Typically, that cap sits near 45°C (113°F).

Break-in and cycling procedure

Next, break in new or un-cycled packs before you push race amps. Specifically, ramp current in small steps so the pack adapts. As a result, voltage holds longer under load.

Use this gradual sequence based on capacity. For example, a 400mAh pack uses the currents shown below. Then, stop increasing if temperature climbs too fast.

  • Step 1: Start at 1C (0.4A for 400mAh).
  • Step 2: Move to 2C (0.8A).
  • Step 3: Increase to 3C (1.2A).
  • Step 4: Continue to 4C (1.6A) and so on.
  • Maximum limit: Never exceed 10C maximum (4.0A for 400mAh).

Meanwhile, log each run so you can spot trends in heat and sag. Furthermore, keep your connectors and leads consistent during testing. Consequently, your data stays meaningful.

The 1/28 scale secret: double cycle

However, micro packs often stay too cool during one cycle. Therefore, one pass may not warm the chemistry enough for full conditioning. In fact, that can leave power feeling flat on lap one.

Instead, run a double cycle back-to-back. Additionally, this approach builds heat naturally without breaking the 10C limit. As a result, you reach peak output while staying inside safe current.

Critical temperature management

Finally, ambient temperature dictates how many amps you can safely run. Consequently, let packs cool between sessions, especially on hot days. Moreover, use our sensor every time and stay under 45°C (113°F).

Ready to upgrade your pit station? Shop our iCharger Temperature Sensor for LiPo Battery and start building repeatable pace. Additionally, review lithium polymer battery chemistry basics to understand why heat control matters.

C Rating Explained for RC Packs

C Rating Explained: RC Charge Math

C Rating Explained starts with one goal: charge safely and keep packs strong. Therefore, you need to match charge amps to capacity. Moreover, the label numbers can look confusing at first. However, the math stays simple once you see it.

First, think of a C rating as a multiplier for your pack capacity. In addition, it tells you how much current you can push during charging. As a result, you protect cell health and reduce heat.

Understanding what a C rating means

Specifically, 1C equals one times your battery capacity in amps. For example, a 5000mAh pack equals 5.0A at 1C. Similarly, higher C values increase charge current. However, you should follow your pack maker limits.

  • 1C = 1x capacity (a standard safe charge rate).
  • 2C = 2x capacity (a faster charge rate).
  • 5C = 5x capacity (fast charging for quality race packs).

Notably, charging faster can raise heat and stress. Therefore, watch pack temperature and stop if it climbs fast. Also, use a quality charger and solid connections.

How to calculate your charge rate

First, convert milliamp-hours to amps with one quick step. Then, multiply by the C rate you want. Consequently, you get the correct charger current setting.

  • Formula: mAh / 1000 = Amps

The 5000mAh example: 5000mAh becomes 5.0A. Therefore, 1C equals 5.0A, and 2C equals 10.0A.

  • 1C charge rate: 5.0A (5.0 x 1)
  • 2C charge rate: 10.0A (5.0 x 2)
  • 5C charge rate: 25.0A (5.0 x 5)

Pro tip: 4400mAh equals 4.4A. Thus, 1C equals 4.4A, and 2C equals 8.8A.

Additionally, you can confirm the idea with a reliable reference on lithium polymer battery charging basics. Moreover, that context helps you understand why heat control matters.

What 1S2P means for RC batteries

Next, you may see 1S2P on some 1/12 or GT12 packs. Although it looks technical, it simply describes wiring inside the case. Consequently, it tells you how voltage and capacity behave.

  • 1S (1 series): sets voltage, so it matches one cell (3.7V nominal / 4.2V max).
  • 2P (2 parallel): sets capacity, so two cells share the load side by side.

Importantly, parallel wiring doubles capacity and lowers internal resistance. As a result, you often get more runtime and stronger punch. However, voltage stays the same as a normal 1S pack.

So how do you charge it? You treat it like one larger 1S battery. Therefore, set the charger to 1S (4.20V max) and base amps on total label capacity.

  • Voltage setup: set your charger to 1S (4.20V).
  • Amps setup: calculate C from the total capacity on the label.

Finally, C Rating Explained helps you choose amps with confidence. Moreover, that simple habit supports longer pack life and steadier performance.

RC Discharger